My Blinkie

Tuesday, October 19, 2010

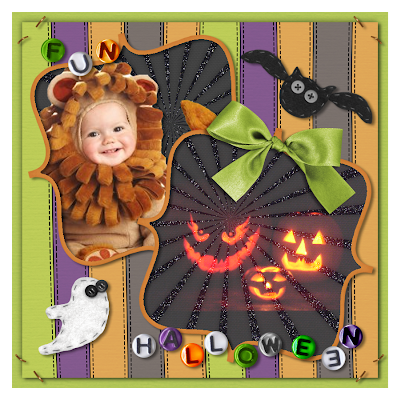
Emo Girls are Cool!
Tube of choice, I used Suzanne Woolcott and Rion Vernon
Scrap used Emo Girls by Clarey Designz
Font of choice I used Blowfish
Graphic
Program of choice, I use PSP 9
This tutorial assumes you have working knowledge of paint shop pro,
All of my tutorials are my own creation and any
similarity with any other tutorial is purely coincidential.
Please do not copy my tutorials to anyplace, please link back to my blog!
Open a new image 750x750 and flood fill white,
(you can ALWAYS resize later, I like having plenty of room to work)
Open clarey_emogrils_paper19 c/p as a new layer
and apply a mask of choice I used Vix_MaskHalloween0904
Now lets open clarey_emogirls_frame1 c/p as a new
layer resize this by 65% now duplicate and mirror,
on the first one you posted image rotate to the right by 9%
on the duplicated one rotate to the left by 9% arrange
to your liking (you can use my tag as a guide)
Now grab your magic wand and click inside the first
frame you added, modify expand by 5 now selections invert, open clarey_emogirls_paper9 c/p as a new layer and move
below your frame resize by 80% and hit delete, and
then select none, now do the same with the other frame,
this time I used clarey_emogirls_paper7,
now open clarey_emogirls_droplets2 c/p as a new layer,
move this layer to right above the mask layer and resize by 40%
place towards the bottom right of the mask area, and
then duplicate and flip then mirror this,
open clarey_emogirls_wordart6 c/p as a new layer
and bring this to the top resize this by 55%
now rotate to the left by 3%, arrange near the
bottom edge of the bottom frame,
now open clarey_emogirls_flower5 c/p as a
new layer bring this to the top and resize
this by 55% arrange this on the top frame towards the right, open clarey_emogirl_flower6 c/p as a new layer and
resize this by 55% arrange on the bottom left
side of the bottom frame,
Open clarey_emogirls_flower1c/p as a new
layer and resize this by 55% and then mirror
this place with your flower on the top frame. Now lets open clarey_emogirls_glitterdoodle3 c/p as a new
layer right above your mask layer resize by 55%
and arrange towards the top of the mask area,
duplicate and mirror then flip,
Now when you are happy with your elements add a
dropshadow of choice and a tube or tubes of choice,
hide the white background layer and merge visible.
I always resize my finished tag BEFORE adding my copyright info,
it makes this seem clearer, add your name and copy right information
and Save the way you prefer to save tags,
I hope you enjoyed this tut
smiles
christy
Ü
Monday, October 18, 2010

click to go to my scrap blog!!!
Sunday, October 17, 2010
 Witches Night Out
Tube of choice, I used Suzanne Woolcott and Elias Chatzoudis
Scrap used Sweet Halloween by Scrapping Mar
Witches Night Out
Tube of choice, I used Suzanne Woolcott and Elias Chatzoudis
Scrap used Sweet Halloween by Scrapping Mar tagger sized kit used in this tutorial
Font of choice I used Chachi
Graphic Program of choice, I use PSP 9
This tutorial assumes you have working knowledge of paint shop pro,
All of my tutorials are my own creation and any similarity
with any other tutorial is purely coincidential.
Please do not copy my tutorials to anyplace, please link back to my blog!
Open a new image 750x750 and flood fill white,
(you can ALWAYS resize later, I like having plenty of room to work)
Open SweetHalloween_ScrappingMar4 c/p as a new layer
resize this by 80% and apply a mask of choice, I used
Vix_MaskHalloween0904
Open SweetHalloween_ScrappingMar26 c/p as a new layer
resize this by 70% Now open SweetHalloween_ScrappingMar28
c/p as a new layer, move this below your frame layer and resize
by 45% arrange like in my tag, now open SweetHalloween_ScrappingMar38
c/p as a new layer bring this layer to the top and resize by 30% and arrange
to the left top of the frame, now grab your magic wand, click inside
your frame and modify expand by 5 and then open SweetHalloween_ScrappingMar5
c/p as a new layer (below your frame layer) now hit delete,
Now lets open SweetHalloween_ScrappingMar48 c/p as a new layer
you want this layer under the frame layer, resize by 30%
arrange to your liking now open SweetHalloween_ScrappingMar51
c/p as a new layer, arrange this layer right above your mask layer
and resize by 30% I duplicated and flipped mine
Open SweetHalloween_ScrappingMar49 c/p as a new layer
bring to top and resize by 30% and then mirror it, Now lets open
SweetHalloween_ScrappingMar44 c/p as a new layer and bring to
the top, resize this by 30% and then again by 45% and place on the hat
Now add a dropshadow of choice to your elements, (the legs have a good one
already) and a tube or tubes of choice, when you are happy with your tag
hide the white background layer and merge visible.
I always resize my finished tag BEFORE adding my copyright info,
it makes this seem clearer, add your name and copy right
information and Save the way you prefer to save tags,
I hope you enjoyed this tut
smiles
christy
Ü

Friday, October 15, 2010
 Autumn's Peace
Tube of choice, I used Suzanne Woolcott and Rion Vernon
Scrap used Autumn Wedding by Bea Creations
Font of choice I used Allison by Rob
Graphic Program of choice, I use PSP 9
This tutorial assumes you have working knowledge of paint shop pro,
All of my tutorials are my own creation and any similarity
with any other tutorial is purely coincidential.
Please do not copy my tutorials to anyplace, please link back to my blog!
Open a new image 750x750 and flood fill white,
(you can ALWAYS resize later, I like having plenty of room to work)
Open p13_bc_autumnwedding c/p as a new layer and apply a mask of
choice, I used BabesDesignz_Mask39 I stretched it a tiny bit
when I merge the group,
Now open frame09_bc_autumnwedding c/p as a new layer, grab
your magic wand and click inside the frame opening, selections expand
by 5 and then invert, now open p01_bc_autumnwedding c/p as a new
layer below the frame and hit delete, now select none, Now lets add a few
decorations to the outside of the frame, Open autumn03_bc_autumnwedding
c/p as a new layer arrange and bring to top, place this at the bottom of your frame
duplicate and mirror, Now open flower03_bc_autumnwedding and c/p as a new
layer place with your leaves, duplicate and mirror, Open autumn05_bc_autumnwedding
c/p as a new layer, move this layer to right above your frame layer, duplicate and
mirror, Now open autumn04_bc_autumnwedding c/p as a new layer again this
is right above your frame layer, resize this by 30% now flip and arrange to your liking
duplicate and mirror this, Now open flower07_bc_autumnwedding c/p as a new layer
this time arrange the layer to right above the mask layer, move it down so it peeks
out at the bottom of the tag, I duplicated and mirrored mine,
Now open autumn07_bc_autumnwedding c/p as a new layer and bring this to the
top I resized mine by 85% Now open flower09_bc_autumnwedding c/p as a new
layer resize this by 65% arrange this layer to right above the frame layer
and arrange to the center of your leaves now open autumn14_bc_autumnwedding
c/p as a new layer arrange this layer to the top and resize this by 65% now
place near your cinnamon sticks Now open autumn13_bc_autumnwedding c/p
as a new layer and resize this by 65% and place near your cinnamon sticks as well
Now open dove01_bc_autumnwedding c/p as a new layer and place at the top left
of the frame, now when you are happy with all your elements and tag, add a drop
shadow of choice, and a tube of choice, hide the white background layer and
merge visible.
I always resize my finished tag BEFORE adding my copyright info,
it makes this seem clearer, add your name and copy right
information and Save the way you prefer to save tags,
I hope you enjoyed this tut
smiles
christy
Ü
Autumn's Peace
Tube of choice, I used Suzanne Woolcott and Rion Vernon
Scrap used Autumn Wedding by Bea Creations
Font of choice I used Allison by Rob
Graphic Program of choice, I use PSP 9
This tutorial assumes you have working knowledge of paint shop pro,
All of my tutorials are my own creation and any similarity
with any other tutorial is purely coincidential.
Please do not copy my tutorials to anyplace, please link back to my blog!
Open a new image 750x750 and flood fill white,
(you can ALWAYS resize later, I like having plenty of room to work)
Open p13_bc_autumnwedding c/p as a new layer and apply a mask of
choice, I used BabesDesignz_Mask39 I stretched it a tiny bit
when I merge the group,
Now open frame09_bc_autumnwedding c/p as a new layer, grab
your magic wand and click inside the frame opening, selections expand
by 5 and then invert, now open p01_bc_autumnwedding c/p as a new
layer below the frame and hit delete, now select none, Now lets add a few
decorations to the outside of the frame, Open autumn03_bc_autumnwedding
c/p as a new layer arrange and bring to top, place this at the bottom of your frame
duplicate and mirror, Now open flower03_bc_autumnwedding and c/p as a new
layer place with your leaves, duplicate and mirror, Open autumn05_bc_autumnwedding
c/p as a new layer, move this layer to right above your frame layer, duplicate and
mirror, Now open autumn04_bc_autumnwedding c/p as a new layer again this
is right above your frame layer, resize this by 30% now flip and arrange to your liking
duplicate and mirror this, Now open flower07_bc_autumnwedding c/p as a new layer
this time arrange the layer to right above the mask layer, move it down so it peeks
out at the bottom of the tag, I duplicated and mirrored mine,
Now open autumn07_bc_autumnwedding c/p as a new layer and bring this to the
top I resized mine by 85% Now open flower09_bc_autumnwedding c/p as a new
layer resize this by 65% arrange this layer to right above the frame layer
and arrange to the center of your leaves now open autumn14_bc_autumnwedding
c/p as a new layer arrange this layer to the top and resize this by 65% now
place near your cinnamon sticks Now open autumn13_bc_autumnwedding c/p
as a new layer and resize this by 65% and place near your cinnamon sticks as well
Now open dove01_bc_autumnwedding c/p as a new layer and place at the top left
of the frame, now when you are happy with all your elements and tag, add a drop
shadow of choice, and a tube of choice, hide the white background layer and
merge visible.
I always resize my finished tag BEFORE adding my copyright info,
it makes this seem clearer, add your name and copy right
information and Save the way you prefer to save tags,
I hope you enjoyed this tut
smiles
christy
Ü

 It's Looking Like Christmas!
This tutorial is for a Special lady named
Kathy, She is like me she LOVES Christmas
and she is a Dear friend who Gifted me this
darling darling kit, Thank you so much Kathy
for your Friendship and support
Tube of choice, I used Suzanne Woolcott and Amber Kelso
Scrap used Still Joyful Hearts by NitWits
It's Looking Like Christmas!
This tutorial is for a Special lady named
Kathy, She is like me she LOVES Christmas
and she is a Dear friend who Gifted me this
darling darling kit, Thank you so much Kathy
for your Friendship and support
Tube of choice, I used Suzanne Woolcott and Amber Kelso
Scrap used Still Joyful Hearts by NitWits the corner piece is from the Still Joyful Hearts Lil Bits part of the kit
Font of choice I used Andy
Graphic Program of choice, I use PSP 9
This tutorial assumes you have working knowledge of paint shop pro,
All of my tutorials are my own creation and any similarity
with any other tutorial is purely coincidential.
Please do not copy my tutorials to anyplace, please link back to my blog!
Open a new image 750x750 and flood fill white,
(you can ALWAYS resize later, I like having plenty of room to work)
open bg_dkpurple_maryfran resize by 19% c/p as a new layer
apply a round mask of choice, I used CreativeDesiresMask31
Now lets open frame_1_maryfran c/p as a new layer resize this by
23% grab your magic wand and click inside the frame selections
modify expand by 5 and then selections invert open bg_hollypurple_maryfran
resize this by 19% and c/p as a new layer below the frame, hit delete and
select none, now lets open cornercluster_maryfran c/p as a new layer
bring this layer to the top, resize by 25% and place on the bottom right
of the frame, Open snowman_1_maryfran c/p as a new layer and resize
this by 20% and place him on the bottom left of the frame, Now open
wordart_christmas_maryfran c/p as a new layer and resize this by
20% and arrange towards the bottom of your work area, now add
a dropshadow of choice to your elements and a tube of choice, when you
are happy with your tag hide the white background layer and merge visible
I always resize my finished tag BEFORE adding my copyright info,
it makes this seem clearer, add your name and copy right
information and Save the way you prefer to save tags,
I hope you enjoyed this tut
smiles
christy
Ü

Thursday, October 14, 2010
 Have a Bewitching Halloween!
Tube of choice, I used Suzanne Woolcott and Caron Vinson
Scrap used Bewitching (Full size kit used in this tut) by Gemini Creationz
Font of choice I used Cinnamon Roll Frosted DF
Word art Boo to You by me and you can get that HERE
Graphic Program of choice, I use PSP 9
This tutorial assumes you have working knowledge of paint shop pro,
All of my tutorials are my own creation and any similarity
with any other tutorial is purely coincidential.
Please do not copy my tutorials to anyplace, please link back to my blog!
Open a new image 750x750 and flood fill white,
(you can ALWAYS resize later, I like having plenty of room to work)
Open gcz-bewitching-frame4 c/p as a new layer and resize this by
26% Now open gcz-bewitching-paper2 resize this by 19%
c/p as a new layer, move this below your frame layer and apply a round
mask of choice I used DBV Mask 02 , I also duplicated my mask layer
Now lets grab our magic wand and click inside the frame, modify expand
now selections invert, open gcz-bewitching-paper12 c/p as a new layer
below your frame layer and hit delete, select none, Now lets open
gcz-bewitching-hat, c/p as a new layer, bring this layer to the top
now resize this by 15% arrange to your liking on your frame, Now open
gcz-bewitching-ghost, c/p as a new layer, resize this by 15% and the rotate
to the right by 15 arrange towards the top left of the frame, Now open
gcz-bewitching-stars, c/p as a new layer, arrange this layer to right above
your frame layer, resize this by 15% then mirror this, Now open gcz-bewitching-bow3
c/p as a new layer and resize this by 22% arrange this to be on the hat, Open
gcz-bewitching-beadspill c/p as a new layer, arrange this layer to right above
your mask layer, resize by 22% arrange to the right of the frame, now duplicate
this layer and mirror it, now go image flip, Now lets open gcz-bewitching-paperbranch
c/p as a new layer again this is below the frame layer, resize this by 22% arrange
so it peeks from behind the frame on the left, duplicate and flip and then mirror
Now open gcz-bewitching-web, go to the paper layer that you put behind your
frame, grab your magic wand and click OUTSIDE the paper, c/p the web
resize it by 18% and hit delete, I changed my layer blend mode to screen
Now select none, Now open gcz-bewitching-cat c/p as a new layer and bring this
to the top, resize by 12% and place near your hat, add a dropshadow of choice
to your elements and a tube of choice, when you are happy with your tag, hide
the white background layer and merge visible.
I always resize my finished tag BEFORE adding my copyright info,
it makes this seem clearer, add your name and copy right
information and Save the way you prefer to save tags,
I hope you enjoyed this tut
smiles
christy
Ü
Have a Bewitching Halloween!
Tube of choice, I used Suzanne Woolcott and Caron Vinson
Scrap used Bewitching (Full size kit used in this tut) by Gemini Creationz
Font of choice I used Cinnamon Roll Frosted DF
Word art Boo to You by me and you can get that HERE
Graphic Program of choice, I use PSP 9
This tutorial assumes you have working knowledge of paint shop pro,
All of my tutorials are my own creation and any similarity
with any other tutorial is purely coincidential.
Please do not copy my tutorials to anyplace, please link back to my blog!
Open a new image 750x750 and flood fill white,
(you can ALWAYS resize later, I like having plenty of room to work)
Open gcz-bewitching-frame4 c/p as a new layer and resize this by
26% Now open gcz-bewitching-paper2 resize this by 19%
c/p as a new layer, move this below your frame layer and apply a round
mask of choice I used DBV Mask 02 , I also duplicated my mask layer
Now lets grab our magic wand and click inside the frame, modify expand
now selections invert, open gcz-bewitching-paper12 c/p as a new layer
below your frame layer and hit delete, select none, Now lets open
gcz-bewitching-hat, c/p as a new layer, bring this layer to the top
now resize this by 15% arrange to your liking on your frame, Now open
gcz-bewitching-ghost, c/p as a new layer, resize this by 15% and the rotate
to the right by 15 arrange towards the top left of the frame, Now open
gcz-bewitching-stars, c/p as a new layer, arrange this layer to right above
your frame layer, resize this by 15% then mirror this, Now open gcz-bewitching-bow3
c/p as a new layer and resize this by 22% arrange this to be on the hat, Open
gcz-bewitching-beadspill c/p as a new layer, arrange this layer to right above
your mask layer, resize by 22% arrange to the right of the frame, now duplicate
this layer and mirror it, now go image flip, Now lets open gcz-bewitching-paperbranch
c/p as a new layer again this is below the frame layer, resize this by 22% arrange
so it peeks from behind the frame on the left, duplicate and flip and then mirror
Now open gcz-bewitching-web, go to the paper layer that you put behind your
frame, grab your magic wand and click OUTSIDE the paper, c/p the web
resize it by 18% and hit delete, I changed my layer blend mode to screen
Now select none, Now open gcz-bewitching-cat c/p as a new layer and bring this
to the top, resize by 12% and place near your hat, add a dropshadow of choice
to your elements and a tube of choice, when you are happy with your tag, hide
the white background layer and merge visible.
I always resize my finished tag BEFORE adding my copyright info,
it makes this seem clearer, add your name and copy right
information and Save the way you prefer to save tags,
I hope you enjoyed this tut
smiles
christy
Ü

Monday, October 11, 2010
 Have a Gorjuss Halloween
Tube of choice, I used Suzanne Woolcott and Caron Vinson
Scrap used Halloween Fun by Seachell
Font of choice I used Pieces of Eight and CinnamonRollFrostedJF
Graphic Program of choice, I use PSP 9
This tutorial assumes you have working knowledge of paint shop pro,
All of my tutorials are my own creation and any similarity
with any other tutorial is purely coincidential.
Please do not copy my tutorials to anyplace, please link back to my blog!
Open a new image 750x750 and flood fill white,
(you can ALWAYS resize later, I like having plenty of room to work)
Open Seachell_Boo_Paper9 resize this by 18% c/p as a new layer
and apply a mask of choice, I used GemsMask8
Now lets open Seachell_HF_Element11 c/p as a new layer and resize
this by 18% and place where you would like, Duplicate and mirror
change the blend mode on each of these to luminance.
Now lets open Seachell_HF_Element25 c/p as a new layer
resize this by 18% place this between the two cloud layers, I changed
the blend mode on this layer to luminance as well, Now lets open
Seachell_HF_Element15 c/p as a new layer right above the mask layer
resize this by 80% change the blend mode to overlay and turn the
opacity down to 35% Now lets open Seachell_HF_Element16 c/p as a
new layer and resize this by 55% place on the left of your work area,
Now open Seachell_HF_Element6 c/p as a new layer and resize this
by 15% and place in the tree, Now open Seachell_HF_Element1 c/p
as a new layer and resize this by 15% and place near the tree, Open
Seachell_HF_Element4 c/p as a new layer and resize this by 5% and
place near the little witch, Now lets open Seachell_HF_Element18
c/p as a new layer, arrange this layer below the tree layer, resize this
by 10% now rotate to the right by 15% and move it over a bit to the right
Now grab your magic wand and click inside the frame and modify expand
by 5 now selections invert, Open Seachell_Boo_Paper3 resize this by
18% now c/p as a new layer below the frame layer, arrange so more of the
orange on the paper shows the the dark part, and hit delete, select none
Now add a tube of choice and a dropshadow of choice to your elements
I did not dropshadow the moon or cloud layers,
I always resize my finished tag BEFORE adding my copyright info,
it makes this seem clearer, add your name and copy right
information and Save the way you prefer to save tags,
I hope you enjoyed this tut
smiles
christy
Ü
Have a Gorjuss Halloween
Tube of choice, I used Suzanne Woolcott and Caron Vinson
Scrap used Halloween Fun by Seachell
Font of choice I used Pieces of Eight and CinnamonRollFrostedJF
Graphic Program of choice, I use PSP 9
This tutorial assumes you have working knowledge of paint shop pro,
All of my tutorials are my own creation and any similarity
with any other tutorial is purely coincidential.
Please do not copy my tutorials to anyplace, please link back to my blog!
Open a new image 750x750 and flood fill white,
(you can ALWAYS resize later, I like having plenty of room to work)
Open Seachell_Boo_Paper9 resize this by 18% c/p as a new layer
and apply a mask of choice, I used GemsMask8
Now lets open Seachell_HF_Element11 c/p as a new layer and resize
this by 18% and place where you would like, Duplicate and mirror
change the blend mode on each of these to luminance.
Now lets open Seachell_HF_Element25 c/p as a new layer
resize this by 18% place this between the two cloud layers, I changed
the blend mode on this layer to luminance as well, Now lets open
Seachell_HF_Element15 c/p as a new layer right above the mask layer
resize this by 80% change the blend mode to overlay and turn the
opacity down to 35% Now lets open Seachell_HF_Element16 c/p as a
new layer and resize this by 55% place on the left of your work area,
Now open Seachell_HF_Element6 c/p as a new layer and resize this
by 15% and place in the tree, Now open Seachell_HF_Element1 c/p
as a new layer and resize this by 15% and place near the tree, Open
Seachell_HF_Element4 c/p as a new layer and resize this by 5% and
place near the little witch, Now lets open Seachell_HF_Element18
c/p as a new layer, arrange this layer below the tree layer, resize this
by 10% now rotate to the right by 15% and move it over a bit to the right
Now grab your magic wand and click inside the frame and modify expand
by 5 now selections invert, Open Seachell_Boo_Paper3 resize this by
18% now c/p as a new layer below the frame layer, arrange so more of the
orange on the paper shows the the dark part, and hit delete, select none
Now add a tube of choice and a dropshadow of choice to your elements
I did not dropshadow the moon or cloud layers,
I always resize my finished tag BEFORE adding my copyright info,
it makes this seem clearer, add your name and copy right
information and Save the way you prefer to save tags,
I hope you enjoyed this tut
smiles
christy
Ü

Sunday, October 10, 2010
 The Girls of Autumn
Tube of choice, I used Suzanne Woolcott and Rion Vernon
Scrap used a darling Free to use scrap called
The Girls of Autumn
Tube of choice, I used Suzanne Woolcott and Rion Vernon
Scrap used a darling Free to use scrap calledAutumn Wishes by Scrapping Mar
Font of choice I used Street Corner Slab
Graphic Program of choice, I use PSP 9
This tutorial assumes you have working knowledge of paint shop pro,
All of my tutorials are my own creation and any similarity
with any other tutorial is purely coincidential.
Please do not copy my tutorials to anyplace, please link back to my blog!
Open a new image 750x750 and flood fill white,
(you can ALWAYS resize later, I like having plenty of room to work)
Open AutumnWishes_scrappingmar34 c/p as a new layer and resize
this by 24% grab your magic wand and click inside the frame openings
selections modify expand by 5 selections invert, now open
AutumnWishes_ScrappingMar7 resize this by 20% now
c/p as a new layer below the frame layer and hit delete, select none
Now open AutumnWishes_ScrappingMar10 resize this by 20%
c/p as a new layer right above your white background layer, and apply a
mask of choice, I used montiblindsmask1 I used raster deform tool to
stretch it out a bit and squish it a bit, now lower the opacity to 35%
Now I added AutumnWishes_ScrappingMar7 resized by 19%
right above the white background layer, applied the same mask
merge group and rotate to the right by 90% squish and deform like
before, turn the opacity down to 35% on this layer as well (it should look
like a plaid mask) Now lets open AutumnWishes_ScrappingMar2 c/p
as a new layer bring this layer to the top and resize by 8% and place on
the right side of your frame, Now open AutumnWishes_ScrappingMar4
c/p as a new layer and resize this by 8% place at the top left of the frame
open AutumnWishes_ScrappingMar35 c/p as a new layer and resize
this by 14% arrange with your little girl, I placed this layer below the little
girl layer, now lets open AutumnWishes_ScrappingMar13 c/p as a new layer
resize this by 25% arrange this layer below the apple and place the
flower near the apple, Open AutumnWishes_ScrappingMar14 c/p as a
new layer and resize by 25% arrange with your other flower I duplicated
this and arrange the duplicate with the other flowers,
Open AutumnWishes_ScrappingMar25 c/p as a new layer and bring
this layer to the top, resize by 15% now mirror this, and place with your flowers
I rotated mine to the right by 12% I moved my apple layer back to the top
and centered it on the bow, Now lets open AutumnWishes_ScrappingMar10
c/p as a new layer resize this by 15% arrange on the corner of one of the
frames, duplicate and arrange on another corner of the frame, Now add
a dropshadow of choice and tube or tubes of choice, when you are happy
with your tag hide the white background layer and merge visible.
I always resize my finished tag BEFORE adding my copyright info,
it makes this seem clearer, add your name and copy right
information and Save the way you prefer to save tags,
I hope you enjoyed this tut
smiles
christy
Ü

 Autumn By the Shore
Tube of choice, I used Suzanne Woolcott and Rion Vernon
Scrap used Ocean Slumber by Irene Alexeeva
Font of choice I used DartangnonITC
Graphic Program of choice, I use PSP 9
This tutorial assumes you have working knowledge of paint shop pro,
All of my tutorials are my own creation and any similarity
with any other tutorial is purely coincidential.
Please do not copy my tutorials to anyplace, please link back to my blog!
Open a new image 750x750 and flood fill white,
(you can ALWAYS resize later, I like having plenty of room to work)
Open ial_osl_paper4 resize by 18% c/p as a new layer and apply
a mask of choice, I used WSL_mask 194
Now lets open ial_osl_rope_frame c/p as a new layer resize this
by 27% now rotate this to the left by 12% Now open ial_osl_fishnet
c/p as a new layer resize this by 30% place this layer below the frame
duplicate and then flip, now grab your magic wand click inside the frame
and go selections modify expand by 5, and then invert, Now open
ial_osl_paper2 resize by 18% c/p as a new layer move below the frame
layer and hit delete, Now lets open ial_osl_twig3 c/p as a new layer
move this layer to the top, resize by 25% arrange towards the bottom of
the frame, now open ial_osl_twig1 c/p as a new layer and resize this by
25% place with your other twig, Now lets open ial_osl_sand_swirl
c/p as a new layer and resize this by 20% arrange this layer below
your twig layers, Now open ial_osl_sand_spray c/p as a new layer
resize this by 20% arrange this layer right above the net layer
and arrange with your other sand, now duplicate and the mirror this
and then flip it, arrange with your other sand, Now lets open
ial_osl_leaf3 c/p as a new layer bring this layer to the top resize
by 10% now rotate to the left by 12% arrange towards the right of
the twigs, now open ial_osl_leaf1 c/p as a new layer resize this one
by 12% arrange with the other leaf now duplicate and then flip this
and mirror this leaf, arrange with the other leaves, now open ial_osl_leaf5
c/p as a new layer resize this by 10% arrange with your other leaves
duplicate and then rotate to the left by 90%, now lets open ial_osl_dried_branch
c/p as a new layer place this layer right above your twigs layers, now resize
this by 16% arrange to your liking, now open ial_osl_pinecone, c/p as a new
layer bring this layer to the top resize this by 16% now image flip, and duplicate
now rotate this by 90% to the left, arrange the two pinecones together
Open ial_osl_starfish2 c/p as a new layer resize this by 16% arrange on
the leaf cluster you made, now open ial_osl_shell3 c/p as a new layer
and resize by 15% arrange with your leaves and starfish, I moved my
layer below the starfish, open any other shells of choice and add to
this area, I used ial_osl_shell5 and ial_osl_shell6 resized by 12%
Now lets open ial_osl_pepple1 c/p as a new layer resize this by
8% arrange to your liking, now lets open ial_osl_tag c/p as a new layer
bring layer to the top and resize by 18% now rotate to the right by
21% arrange towards the top knot of the frame, open ial_osl_knot
c/p as a new layer and resize this by 36% and place to "hold"
the tag. Now apply a drop shadow of choice to your elements
,and a tube of choice when you are happy with your tag,
hide your white background layer and merge visible.
I always resize my finished tag BEFORE adding my copyright info,
it makes this seem clearer, add your name and copy right
information and Save the way you prefer to save tags,
I hope you enjoyed this tut
smiles
christy
Ü
Autumn By the Shore
Tube of choice, I used Suzanne Woolcott and Rion Vernon
Scrap used Ocean Slumber by Irene Alexeeva
Font of choice I used DartangnonITC
Graphic Program of choice, I use PSP 9
This tutorial assumes you have working knowledge of paint shop pro,
All of my tutorials are my own creation and any similarity
with any other tutorial is purely coincidential.
Please do not copy my tutorials to anyplace, please link back to my blog!
Open a new image 750x750 and flood fill white,
(you can ALWAYS resize later, I like having plenty of room to work)
Open ial_osl_paper4 resize by 18% c/p as a new layer and apply
a mask of choice, I used WSL_mask 194
Now lets open ial_osl_rope_frame c/p as a new layer resize this
by 27% now rotate this to the left by 12% Now open ial_osl_fishnet
c/p as a new layer resize this by 30% place this layer below the frame
duplicate and then flip, now grab your magic wand click inside the frame
and go selections modify expand by 5, and then invert, Now open
ial_osl_paper2 resize by 18% c/p as a new layer move below the frame
layer and hit delete, Now lets open ial_osl_twig3 c/p as a new layer
move this layer to the top, resize by 25% arrange towards the bottom of
the frame, now open ial_osl_twig1 c/p as a new layer and resize this by
25% place with your other twig, Now lets open ial_osl_sand_swirl
c/p as a new layer and resize this by 20% arrange this layer below
your twig layers, Now open ial_osl_sand_spray c/p as a new layer
resize this by 20% arrange this layer right above the net layer
and arrange with your other sand, now duplicate and the mirror this
and then flip it, arrange with your other sand, Now lets open
ial_osl_leaf3 c/p as a new layer bring this layer to the top resize
by 10% now rotate to the left by 12% arrange towards the right of
the twigs, now open ial_osl_leaf1 c/p as a new layer resize this one
by 12% arrange with the other leaf now duplicate and then flip this
and mirror this leaf, arrange with the other leaves, now open ial_osl_leaf5
c/p as a new layer resize this by 10% arrange with your other leaves
duplicate and then rotate to the left by 90%, now lets open ial_osl_dried_branch
c/p as a new layer place this layer right above your twigs layers, now resize
this by 16% arrange to your liking, now open ial_osl_pinecone, c/p as a new
layer bring this layer to the top resize this by 16% now image flip, and duplicate
now rotate this by 90% to the left, arrange the two pinecones together
Open ial_osl_starfish2 c/p as a new layer resize this by 16% arrange on
the leaf cluster you made, now open ial_osl_shell3 c/p as a new layer
and resize by 15% arrange with your leaves and starfish, I moved my
layer below the starfish, open any other shells of choice and add to
this area, I used ial_osl_shell5 and ial_osl_shell6 resized by 12%
Now lets open ial_osl_pepple1 c/p as a new layer resize this by
8% arrange to your liking, now lets open ial_osl_tag c/p as a new layer
bring layer to the top and resize by 18% now rotate to the right by
21% arrange towards the top knot of the frame, open ial_osl_knot
c/p as a new layer and resize this by 36% and place to "hold"
the tag. Now apply a drop shadow of choice to your elements
,and a tube of choice when you are happy with your tag,
hide your white background layer and merge visible.
I always resize my finished tag BEFORE adding my copyright info,
it makes this seem clearer, add your name and copy right
information and Save the way you prefer to save tags,
I hope you enjoyed this tut
smiles
christy
Ü

Saturday, October 9, 2010
 I LOVE Halloween and I just came across this DARLING KIT
hope you like it too
smiles
christy
Ü
I LOVE Halloween and I just came across this DARLING KIT
hope you like it too
smiles
christy
Ü
Friday, October 8, 2010
 The Bounty of Fall
Tube of choice, I used Suzanne Woolcott and Rion Vernon
Scrap used Autumnal by Gemini Creationz (Full Size kit used in this tut)
Font of choice I used Dartangnon ITC
Graphic Program of choice, I use PSP 9
This tutorial assumes you have working knowledge of paint shop pro,
All of my tutorials are my own creation and any similarity
with any other tutorial is purely coincidential.
Please do not copy my tutorials to anyplace, please link back to my blog!
Open a new image 750x750 and flood fill white,
(you can ALWAYS resize later, I like having plenty of room to work)
Open gcz_atumnal-paper11 resize by 18% c/p as a new layer
and apply a mask of choice I used WSL_Mask208
Now lets open gcz_atumnal-frame4 c/p as a new layer and resize by
22% arrange up and to the right just a bit, now open
gcz-autumnal-frame3 c/p as a new layer resize this by
22% arrange towards the bottom left, Now lets open
gcz-autumnal-leaves2 c/p as a new layer bring this to the top
resize by 17% arrange towards the bottom of the top frame, now
duplicate and mirror and the flip, arrange together, Open
gcz-autumnal-leaves1 c/p as a new layer and resize this by
17% now rotate to the left by 105% now open gcz-autumnal-leaf2
c/p as a new layer and resize this by 17% place this layer below
the other leaves layers, duplicate and rotate to the right by
36% place near the other leaf like this one, now open
gcz-autumnal-leaf, c/p as a new layer now resize this by
8% place this layer below your other leaf layers as well, now
duplicate and mirror this, now rotate this to the left by 36%
I duplicated and then flipped this one and arranged with my
other leaves, now open gcz-autumnal-flower5 c/p as a new
layer and move this layer to the top, resize by 17% now mirror
and then rotate to the right by 80%, Now lets open
gcz-autumnal-berries c/p as a new layer and resize this
by 17% and then rotate to the right by 36% Now lets open
gcz-autumnal-bow1 c/p as a new layer and bring this to the
top, resize by 25% now mirror this and place on top of the leaf
cluster you just made, now open gcz-autumnal-ribbon
c/p as a new layer and resize by 18% now flip then rotate
to the right by 90% move this layer below the bow layer
and place with your leaf cluster as well, Now lets open
gcz-autumnal-flower3 c/p as a new layer, place this layer
right above your mask layer and resize by 18% place so it shows
out from behind the frame on the right and the leaves, now
open gcz-autumnal-flower1 c/p as a new layer, again right above
your mask layer, resize this by 18% place towards the bottom
of the leaf cluster, I duplicated mine once and moved it over
a little to the right and up some, and the same with the other flower
placing this one towards the left of the leaf cluster. Now grab
your magic wand and click inside the BOTTOM frame, selections
modify expand by 5 now selections invert, open gcz-autumnal-paper12
resize by 18% and c/p as a new layer move this below the frame
layer and hit delete, select none, Now go to the top frame, and do the
same, I used gcz-autumnal-paper5 resized like before, Now when
you are happy with your tag, add a dropshadow of choice to your
elements and a tube of choice, hide the white background layer and
merge visible.
I always resize my finished tag BEFORE adding my copyright info,
it makes this seem clearer, add your name and copy right
information and Save the way you prefer to save tags,
I hope you enjoyed this tut
smiles
christy
Ü
The Bounty of Fall
Tube of choice, I used Suzanne Woolcott and Rion Vernon
Scrap used Autumnal by Gemini Creationz (Full Size kit used in this tut)
Font of choice I used Dartangnon ITC
Graphic Program of choice, I use PSP 9
This tutorial assumes you have working knowledge of paint shop pro,
All of my tutorials are my own creation and any similarity
with any other tutorial is purely coincidential.
Please do not copy my tutorials to anyplace, please link back to my blog!
Open a new image 750x750 and flood fill white,
(you can ALWAYS resize later, I like having plenty of room to work)
Open gcz_atumnal-paper11 resize by 18% c/p as a new layer
and apply a mask of choice I used WSL_Mask208
Now lets open gcz_atumnal-frame4 c/p as a new layer and resize by
22% arrange up and to the right just a bit, now open
gcz-autumnal-frame3 c/p as a new layer resize this by
22% arrange towards the bottom left, Now lets open
gcz-autumnal-leaves2 c/p as a new layer bring this to the top
resize by 17% arrange towards the bottom of the top frame, now
duplicate and mirror and the flip, arrange together, Open
gcz-autumnal-leaves1 c/p as a new layer and resize this by
17% now rotate to the left by 105% now open gcz-autumnal-leaf2
c/p as a new layer and resize this by 17% place this layer below
the other leaves layers, duplicate and rotate to the right by
36% place near the other leaf like this one, now open
gcz-autumnal-leaf, c/p as a new layer now resize this by
8% place this layer below your other leaf layers as well, now
duplicate and mirror this, now rotate this to the left by 36%
I duplicated and then flipped this one and arranged with my
other leaves, now open gcz-autumnal-flower5 c/p as a new
layer and move this layer to the top, resize by 17% now mirror
and then rotate to the right by 80%, Now lets open
gcz-autumnal-berries c/p as a new layer and resize this
by 17% and then rotate to the right by 36% Now lets open
gcz-autumnal-bow1 c/p as a new layer and bring this to the
top, resize by 25% now mirror this and place on top of the leaf
cluster you just made, now open gcz-autumnal-ribbon
c/p as a new layer and resize by 18% now flip then rotate
to the right by 90% move this layer below the bow layer
and place with your leaf cluster as well, Now lets open
gcz-autumnal-flower3 c/p as a new layer, place this layer
right above your mask layer and resize by 18% place so it shows
out from behind the frame on the right and the leaves, now
open gcz-autumnal-flower1 c/p as a new layer, again right above
your mask layer, resize this by 18% place towards the bottom
of the leaf cluster, I duplicated mine once and moved it over
a little to the right and up some, and the same with the other flower
placing this one towards the left of the leaf cluster. Now grab
your magic wand and click inside the BOTTOM frame, selections
modify expand by 5 now selections invert, open gcz-autumnal-paper12
resize by 18% and c/p as a new layer move this below the frame
layer and hit delete, select none, Now go to the top frame, and do the
same, I used gcz-autumnal-paper5 resized like before, Now when
you are happy with your tag, add a dropshadow of choice to your
elements and a tube of choice, hide the white background layer and
merge visible.
I always resize my finished tag BEFORE adding my copyright info,
it makes this seem clearer, add your name and copy right
information and Save the way you prefer to save tags,
I hope you enjoyed this tut
smiles
christy
Ü

Wednesday, October 6, 2010
 BOOOO To you
Tube of choice, I used Suzanne Woolcott and Caron Vinson
Scrap used Peek A Boo by Designs by Stina
Font of choice I used Bibliotheque
Graphic Program of choice, I use PSP 9
This tutorial assumes you have working knowledge of paint shop pro,
All of my tutorials are my own creation and any similarity
with any other tutorial is purely coincidential.
Please do not copy my tutorials to anyplace, please link back to my blog!
Open a new image 750x750 and flood fill white,
(you can ALWAYS resize later, I like having plenty of room to work)
Open DBS_paper18 c/p as a new layer and resize this by
80% now apply a mask of choice, I used Artmama's Mask 06
I duplicated this and then merged the two layers
Now lets open DBS_frame05 c/p as a new layer and resize this by
50% and then rotate to the left by 15% and move up and to the left a little
open DBS_frame06 and c/p as a new layer resize by 50% and then
rotate to the right by 15% arrange like in my tag, now grab your magic wand
and click inside the top frame, selections modify expand by 8 selections
invert, now open DBS_paper86 c/p as a new layer and resize this by
50% arrange so it is in the frame opening and hit delete, select none
move this layer below the frame layer, now do the same with the other frame
this time use DBS_paper21
Now lets open DBS_PumpkinBear and c/p as a new layer resize this
by 50%, Now open DBS_hat01 c/p as a new layer
and resize by 25% arrange with your pumpkin bear, now open
DBS_bat02 c/p as a new layer and resize this by 45% duplicate
and the rotate this to the right by 15% and then go rotate the first one
to the left by 15%. Now open DBS_Spider05 c/p as a new layer and
resize this by 25% and place on one of the frame corners.
Now apply a dropshadow of choice to your elements
and a tube or tubes of choice, I also added a gradient glow to
my bats and spider, when you are happy with your tag, hide the white background
layer and merge visible.
I always resize my finished tag BEFORE adding my copyright info,
it makes this seem clearer, add your name and copy right
information and Save the way you prefer to save tags,
I hope you enjoyed this tut
smiles
christy
Ü
BOOOO To you
Tube of choice, I used Suzanne Woolcott and Caron Vinson
Scrap used Peek A Boo by Designs by Stina
Font of choice I used Bibliotheque
Graphic Program of choice, I use PSP 9
This tutorial assumes you have working knowledge of paint shop pro,
All of my tutorials are my own creation and any similarity
with any other tutorial is purely coincidential.
Please do not copy my tutorials to anyplace, please link back to my blog!
Open a new image 750x750 and flood fill white,
(you can ALWAYS resize later, I like having plenty of room to work)
Open DBS_paper18 c/p as a new layer and resize this by
80% now apply a mask of choice, I used Artmama's Mask 06
I duplicated this and then merged the two layers
Now lets open DBS_frame05 c/p as a new layer and resize this by
50% and then rotate to the left by 15% and move up and to the left a little
open DBS_frame06 and c/p as a new layer resize by 50% and then
rotate to the right by 15% arrange like in my tag, now grab your magic wand
and click inside the top frame, selections modify expand by 8 selections
invert, now open DBS_paper86 c/p as a new layer and resize this by
50% arrange so it is in the frame opening and hit delete, select none
move this layer below the frame layer, now do the same with the other frame
this time use DBS_paper21
Now lets open DBS_PumpkinBear and c/p as a new layer resize this
by 50%, Now open DBS_hat01 c/p as a new layer
and resize by 25% arrange with your pumpkin bear, now open
DBS_bat02 c/p as a new layer and resize this by 45% duplicate
and the rotate this to the right by 15% and then go rotate the first one
to the left by 15%. Now open DBS_Spider05 c/p as a new layer and
resize this by 25% and place on one of the frame corners.
Now apply a dropshadow of choice to your elements
and a tube or tubes of choice, I also added a gradient glow to
my bats and spider, when you are happy with your tag, hide the white background
layer and merge visible.
I always resize my finished tag BEFORE adding my copyright info,
it makes this seem clearer, add your name and copy right
information and Save the way you prefer to save tags,
I hope you enjoyed this tut
smiles
christy
Ü

 Spook-Town
Tube of choice, I used Suzanne Woolcott and TooshToosh
Scrap used Ghosttown by Clarey ( I used the page size kit in this tutorial)
Font of choice I used Larger Mime and LDJ Jilly Nilly
Graphic Program of choice, I use PSP 9
This tutorial assumes you have working knowledge of paint shop pro,
All of my tutorials are my own creation and any similarity
with any other tutorial is purely coincidential.
Please do not copy my tutorials to anyplace, please link back to my blog!
Open a new image 750x750 and flood fill white,
(you can ALWAYS resize later, I like having plenty of room to work)
Open clary_ghosttown_paper7 resize by 18% c/p as a new layer
now apply a mask of choice, I used Candys Treats Mask48,
I duplicated my mask layer 2 times then merged them
Now lets open clarey_ghosttown_acrylicframe and c/p as a new
layer and resize this by 35% grab your magic wand and click inside
the frame, modify and expand by 8, now invert selection, open
clarey_ghosttown_paper6 resize this by 18% c/p as a new layer below
the frame layer, now hit delete and leave selected, now open
clarey_ghosttown_fence, c/p as a new layer and resize this by
15% drag it down some so the top shows but doesnt cover the whole
paper in the frame, paste again resizing again by 15% and line them up
leave selected stil, Now open clarey_ghosttown_spookytree c/p as a new
layer and resize this by 12% and move towards the left of your frame, hit delete
and leave selected, now open the tree again this time mirror it before you copy
and paste, this time resize it by 16% move this layer below the other tree layer
and hit delete, now select none, Open clarey_ghosttown_hauntedhouse2_clearwindows
c/p as a new layer (this will be right above the grey paper layer) resize it by
20% and arrange this to the right of the frame area, now open
clarey_ghosttown_graveyard c/p as a new layer resize this by 20% and place
behind your tree's, Now we are going to add some things above the frame
layer, Open clarey_ghosttown_spiderweb2 c/p as a new layer and resize
this by 20% and place on the top right corner of the frame, now
Open clarey_ghosttown_ghost2 c/p as a new layer and resize by
20% mirror him then rotate to the right by 12% and place at the top
left of the frame, now open clarey_ghosttown_cauldron c/p as a new
layer and resize this by 15% place on the bottom right of the frame
open clarey_ghosttown_smoke4 c/p as a new layer resize this by
20% and the mirror it, place it so it is coming out of the cauldron
now open clarey_ghosttown_cupcake1 c/p as a new layer and resize
this by 10% and place near the cauldron, open clarey_ghosttown_candle
c/p as a new layer and resize this by 10% and place with the cupcake
open clarey_ghosttown_broom c/p as a new layer and resize this by
20% and "lean" it up against the cauldron, now add a dropshadow of
choice to your elements and a tube of choice, when you are happy with
your tag, hide the white background layer and merge visible.
I always resize my finished tag BEFORE adding my copyright info,
it makes this seem clearer, add your name and copy right
information and Save the way you prefer to save tags,
I hope you enjoyed this tut
smiles
christy
Ü
Spook-Town
Tube of choice, I used Suzanne Woolcott and TooshToosh
Scrap used Ghosttown by Clarey ( I used the page size kit in this tutorial)
Font of choice I used Larger Mime and LDJ Jilly Nilly
Graphic Program of choice, I use PSP 9
This tutorial assumes you have working knowledge of paint shop pro,
All of my tutorials are my own creation and any similarity
with any other tutorial is purely coincidential.
Please do not copy my tutorials to anyplace, please link back to my blog!
Open a new image 750x750 and flood fill white,
(you can ALWAYS resize later, I like having plenty of room to work)
Open clary_ghosttown_paper7 resize by 18% c/p as a new layer
now apply a mask of choice, I used Candys Treats Mask48,
I duplicated my mask layer 2 times then merged them
Now lets open clarey_ghosttown_acrylicframe and c/p as a new
layer and resize this by 35% grab your magic wand and click inside
the frame, modify and expand by 8, now invert selection, open
clarey_ghosttown_paper6 resize this by 18% c/p as a new layer below
the frame layer, now hit delete and leave selected, now open
clarey_ghosttown_fence, c/p as a new layer and resize this by
15% drag it down some so the top shows but doesnt cover the whole
paper in the frame, paste again resizing again by 15% and line them up
leave selected stil, Now open clarey_ghosttown_spookytree c/p as a new
layer and resize this by 12% and move towards the left of your frame, hit delete
and leave selected, now open the tree again this time mirror it before you copy
and paste, this time resize it by 16% move this layer below the other tree layer
and hit delete, now select none, Open clarey_ghosttown_hauntedhouse2_clearwindows
c/p as a new layer (this will be right above the grey paper layer) resize it by
20% and arrange this to the right of the frame area, now open
clarey_ghosttown_graveyard c/p as a new layer resize this by 20% and place
behind your tree's, Now we are going to add some things above the frame
layer, Open clarey_ghosttown_spiderweb2 c/p as a new layer and resize
this by 20% and place on the top right corner of the frame, now
Open clarey_ghosttown_ghost2 c/p as a new layer and resize by
20% mirror him then rotate to the right by 12% and place at the top
left of the frame, now open clarey_ghosttown_cauldron c/p as a new
layer and resize this by 15% place on the bottom right of the frame
open clarey_ghosttown_smoke4 c/p as a new layer resize this by
20% and the mirror it, place it so it is coming out of the cauldron
now open clarey_ghosttown_cupcake1 c/p as a new layer and resize
this by 10% and place near the cauldron, open clarey_ghosttown_candle
c/p as a new layer and resize this by 10% and place with the cupcake
open clarey_ghosttown_broom c/p as a new layer and resize this by
20% and "lean" it up against the cauldron, now add a dropshadow of
choice to your elements and a tube of choice, when you are happy with
your tag, hide the white background layer and merge visible.
I always resize my finished tag BEFORE adding my copyright info,
it makes this seem clearer, add your name and copy right
information and Save the way you prefer to save tags,
I hope you enjoyed this tut
smiles
christy
Ü

Tuesday, October 5, 2010
Little Devil
 This layout uses Frenchgirl's Part of the
Halloween Party Collab from
A Moment in Scrap
This layout uses Frenchgirl's Part of the
Halloween Party Collab from
A Moment in Scrap
This layout uses Frenchgirl's Part of the
Halloween Party Collab from
A Moment in Scrap
Sunday, October 3, 2010

Up in the Attic
Tube of choice, I used Suzanne Woolcott and TooshToosh
Scrap used Attic Oddities by Irene Alexeeva
Font of choice I used Freebooter-zero zero
Graphic Program of choice, I use PSP 9
This tutorial assumes you have working knowledge
of paint shop pro,
All of my tutorials are my
own creation and any similarity
with any other tutorial is purely coincidental.
Please do not copy my tutorials to anyplace, please link back to my blog!
Open a new image 750x750 and flood fill white,
(
you can ALWAYS resize later, I like having
plenty of room to work)
Open ial_ato_paper03 resize by 18% and
c/p as a new layer
apply a mask of choice,
I used WH-Mask4 I duplicated my
mask layer
once and merged the two together,
Now lets open ial_ato_scattered_stars c/p
as a new layer and resize
this by 13%
I placed one on the wall beside the window
then I duplicated
and rotated to the right
by 90% and placed this on the floor,
Now open ial_ato_rocking_chair c/p
as a new layer, resize this by
13%
now mirror and place near the wall,
Open ial_ato_spider_on_thread
c/p as
a new layer and resize this by 8%
now place it so it "hangs" from
the rocking chair,
now lets open ial_ato_rag_bunny c/p as a
new layer
and resize this by 8% and
place on the floor near the window,
now open
ial_ato_pegtop_shadowed and
c/p as a new layer resize this by 8% and
place this near the bunny but also near
the star scatter,
Now add a tube of
choice to your tag,
I used a big dropshadow on mine, to
try to match the one
on the top,
when you are happy with your tag, hide the white
background layer
and merge visible.
I always resize my finished tag BEFORE
adding my copyright info,
it makes this
seem clearer, add your name and
copy right
information and
Save the way you prefer to save tags,
I hope you enjoyed this tut
smiles
christy
Ü

Saturday, October 2, 2010
 Another layout I am slowly learning this smiles
christy
Ü
Another layout I am slowly learning this smiles
christy
Ü
Subscribe to:
Posts
(Atom)
People I follow


