My Blinkie

Blog Trains

Showing posts with label X-Clusively Christy Scraps. Show all posts
Showing posts with label X-Clusively Christy Scraps. Show all posts
Tuesday, October 13, 2015
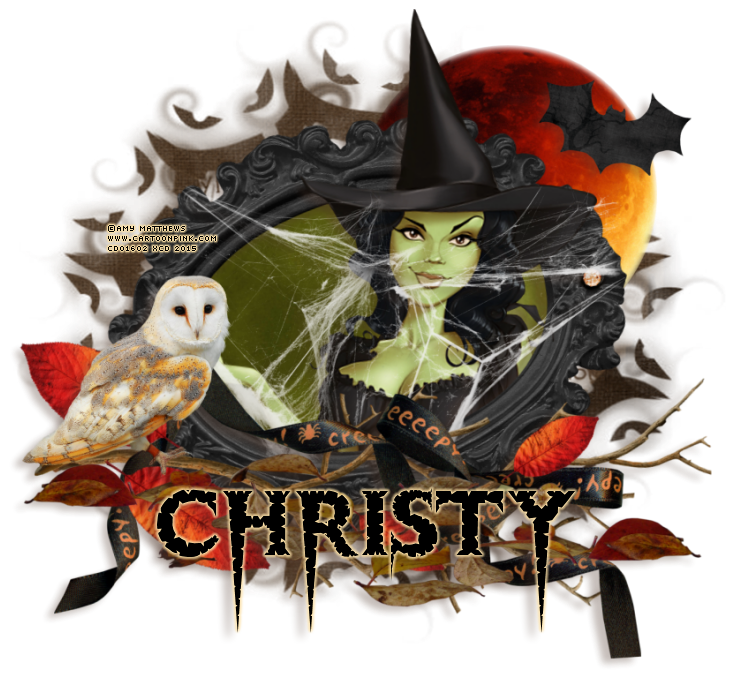
Samhain
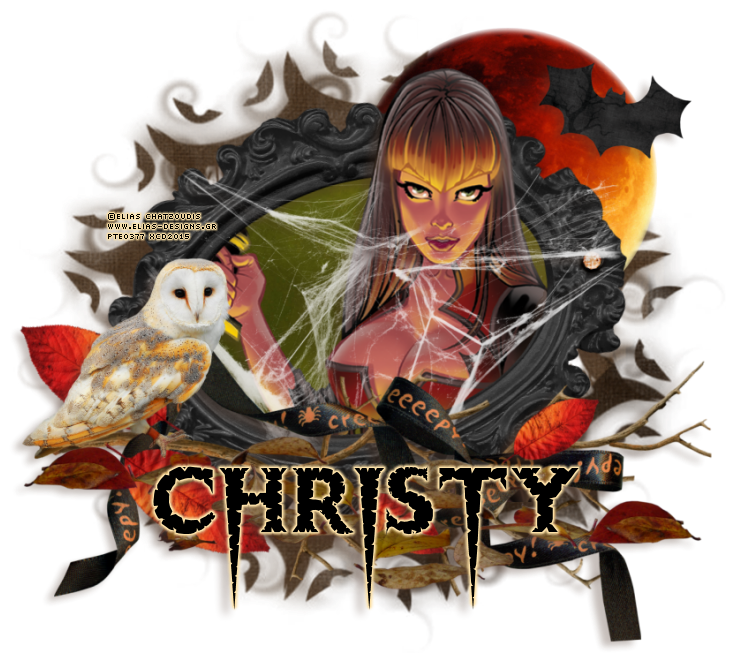
Tube of choice, I used Elias Chatzoudis and Amy Matthews
Scrap kit of choice, I used Samhain by xclusively christy scraps (full size used)
Font of choice, I used Thriller
Graphic Program of choice, I use PSP 9
This tutorial assumes you have working knowledge of paint shop pro,
All of my tutorials are my own creation and any similarity
with any other tutorial is purely coincidential.
Please do not copy my tutorials to anyplace, please link back to my blog!
Open a new image 850x850 and flood fill white,
I Like to have room to work, this is your choice,
My tuts are written using this size image
Open xcd-paper18 and resize to 750x750 (20%) copy and paste
as a new layer and apply a mask of choice I used Vix_maskhalloween0901
merge group,
Now open xcd-frame1 c/p as a new layer and resize by 28%
rotate to the left by 18% grab your magic wand and click inside
the frame opening and expand by 9, invert and open xcd-paper16
resize by 750x750or 21% and c/p as a new layer below the frame
hit delete and select none, now open xcd-branch c/p as a new layer
bring to the top, mirror and then resize by 72% and arrange to your
liking, now open xcd-owl, c/p as a new layer and resize by 30%
and arrange to your liking, open xcd-leaf5 c/p as a new layer and resize
by 48% duplicate and mirror, arrange to your liking, now open xcd-leaf3
c/p as a new layer right above the branch layer and resize by 18%
then rotate to the right by 24% I duplicated mine a few times, and
rotated or flipped them,I also resized them some too
now open xcd-web2 c/p as a new layer
right above the frame layer and resize by 58%. Open xcd-bloodmoon
c/p as a new layer above the mask layer and resize by 45%
open xcd-bat c/p as a new layer resize by 45% two times
now open xcd-ribbon1 c/p as a new layer and rotate to the right
by 90% resize by 65% and arrange this to right above the branch
layer, now add a dropshadow and tube of choice, hide your white
background layer and merge visible.
I always resize my finished tag BEFORE adding my copyright info,
it makes this seem clearer, add your name and copy right
information and Save the way you prefer to save tags,
I hope you enjoyed this tut
smiles
christy
Ü
Tube of choice, I used Elias Chatzoudis and Amy Matthews
Scrap kit of choice, I used Samhain by xclusively christy scraps (full size used)
Font of choice, I used Thriller
Graphic Program of choice, I use PSP 9
This tutorial assumes you have working knowledge of paint shop pro,
All of my tutorials are my own creation and any similarity
with any other tutorial is purely coincidential.
Please do not copy my tutorials to anyplace, please link back to my blog!
Open a new image 850x850 and flood fill white,
I Like to have room to work, this is your choice,
My tuts are written using this size image
Open xcd-paper18 and resize to 750x750 (20%) copy and paste
as a new layer and apply a mask of choice I used Vix_maskhalloween0901
merge group,
Now open xcd-frame1 c/p as a new layer and resize by 28%
rotate to the left by 18% grab your magic wand and click inside
the frame opening and expand by 9, invert and open xcd-paper16
resize by 750x750or 21% and c/p as a new layer below the frame
hit delete and select none, now open xcd-branch c/p as a new layer
bring to the top, mirror and then resize by 72% and arrange to your
liking, now open xcd-owl, c/p as a new layer and resize by 30%
and arrange to your liking, open xcd-leaf5 c/p as a new layer and resize
by 48% duplicate and mirror, arrange to your liking, now open xcd-leaf3
c/p as a new layer right above the branch layer and resize by 18%
then rotate to the right by 24% I duplicated mine a few times, and
rotated or flipped them,I also resized them some too
now open xcd-web2 c/p as a new layer
right above the frame layer and resize by 58%. Open xcd-bloodmoon
c/p as a new layer above the mask layer and resize by 45%
open xcd-bat c/p as a new layer resize by 45% two times
now open xcd-ribbon1 c/p as a new layer and rotate to the right
by 90% resize by 65% and arrange this to right above the branch
layer, now add a dropshadow and tube of choice, hide your white
background layer and merge visible.
I always resize my finished tag BEFORE adding my copyright info,
it makes this seem clearer, add your name and copy right
information and Save the way you prefer to save tags,
I hope you enjoyed this tut
smiles
christy
Ü
Sunday, December 21, 2014

Dreaming of a Pink Christmas
Tube of choice, I used Caron Vinson and Pinuptoons
Scrap kit of choice, I used A Different Color for Christmas by
X-Clusively Christy Scraps (Full size used in tut)
Font of choice, I used Rambler Script
Graphic Program of choice, I use PSP 9
This tutorial assumes you have working knowledge of paint shop pro,
All of my tutorials are my own creation and any similarity
with any other tutorial is purely coincidential.
Please do not copy my tutorials to anyplace, please link back to my blog!
Open a new image 750x750 and flood fill white,
I Like to have room to work, this is your choice,
My tuts are written using this size image
Open paper12 and resize by 20% c/p as a new layer and
apply a mask of choice, I used Artmama mask 6 merge
group
Now open xcd-adc-frame4 c/p as a new layer and resize by
60%, grab your magic wand and click inside the frame opening
expand by 9 and invert, open paper 14 and resize by 18%
c/p as a new layer below the frame, arrange to your liking and
hit delete, select none, now open xcd-adc-tree2 c/p as a new
layer above the mask layer and resize by 60% and arrange to
your liking, open xcd-adc-greenery6 c/p as a new layer, bring
to the top and resize by 36% duplicate, mirror and arrange
this to right above the tree layer, Now open xcd-adc-greenery1
c/p as a new layer, arrange right below the top greenery, and
resize by 36% and rotate to the right by 21% duplicate and mirror
now open xcd-adc-greenery4 c/p as a new layer resize by 36%
arrange to your liking, open xcd-adc-greenery3 c/p as a new
layer, resize by 36% and place in the center of the greens you
have added, now open xcd-adc-leaf1 c/p as a new layer, move
below the layer you just added and resize by 30% and then rotate
to the left by 31% duplicate and mirror, now open xcd-adc-jar
c/p as a new layer, arrange right above the frame layer, resize
by 30% now open xcd-adc-candy and c/p and resize by 20%
now open xcd-adc-candy1 c/p as a new layer, arrange below
the jar layer, rotate to the right by 75% and resize by 22%
place it so it looks like it is "in" the jar, now open xcd-adc-berries1
c/p as a new layer and resize by 22% place to your liking open
xcd-adc-ornament1 c/p as a new layer, arrange right above the
greenery with the berries, and resize by 22% now open
xcd-adc-ornament2 and c/p as a new layer, arrange this to
right above the berries layer and resize by 22%, flip and mirror
now open xcd-adc-ornament4 c/p as a new layer above the
other ornaments and resize by 24%, open xcd-adc-snowflake1
c/p as a new layer, resize by 23% rotate to the left by 15%
and place to your liking, I duplicated mine and placed one behind
the ornaments, now open xcd-adc-snow c/p as a new layer, arrange
to right above the paper layer behind the frame, resize this to your
liking, grab your magic wand and go to the paper, layer, click on the
outside of the paper, go back to the snow layer and hit delete,
select none, add a tube and dropshadow of choice, hide the
white background layer and merge visible.
I did not dropshadow the jar in my examples!
I always resize my finished tag BEFORE adding my copyright info,
it makes this seem clearer, add your name and copy right
information and Save the way you prefer to save tags,
I hope you enjoyed this tut
smiles
christy
Ü

Tuesday, November 18, 2014

Winter Has Arrived
Tube of choice, I used Pinuptoons and Maryline Cazenave
Scrap kit of choice, I used Winter Friends (Full size kit)
by X-Clusively Christy Scraps
Font of choice, I used julietrose std
Graphic Program of choice, I use PSP 9
This tutorial assumes you have working knowledge of paint shop pro,
All of my tutorials are my own creation and any similarity
with any other tutorial is purely coincidential.
Please do not copy my tutorials to anyplace, please link back to my blog!
Open a new image 750x750 and flood fill white,
I Like to have room to work, this is your choice,
My tuts are written using this size image
Open wf-paper10 resize by 750x750(21%)
c/p as a new layer and apply a mask of choice
I used a mask that is named 33 in my stash (any snowflake mask will work)
Now open wf-frame2 and c/p as a new layer, resize by 45% and
rotate to the left by 9% grab your magic wand and click inside
the frame opening and expand by 9 and then invert, open
wf-paper2 resize by 20% (700x700) and paste below the frame
layer and hit delete, select none, now open wf-tree2 c/p
right above the mask layer and resize by 70% arrange to your
liking, open wf-greenery c/p as a new layer bring to the top
and resize by 32% I duplicated mine a few times mirroring
and rotating, arrange to your liking. Now open wf-greenery4
c/p right above the frame layer and resize by 16% again duplicate
flip mirror as many times as you want to fill in the space, now open
wf-greenery1 c/p as a new layer bring to the top and resize by
27% duplicate and mirror,open wf-greenery2 c/p as a new layer
again right above the frame layer and resize by 30% mirror and
rotate to the left by 21% paste again and resize by 40% and
rotate to the right by 75% duplicate and flip,duplicate and mirror,
now open wf-flower3 c/p as a new layer, bring to the top
and resize by 34% now duplicate and resize this one by 80%
arrange to your liking, open wf-flower4 c/p as a new layer below
the red flowers resize by 30% duplicate, now open wf-ribbon2
c/p as a new layer right above the greenery layer and resize
by 29% rotate to the right by 9% open wf-ribbon4 c/p as a
new layer below the other ribbon and resize by 40% rotate to
the left by 12% now open wf-candy c/p as a new layer above
the thin greenery but below the leaves, and resize by 42%
mirror and rotate to the left by 6% paste again and resize by
32% mirror and rotate left by 15% now add a dropshadow
and a tube of choice, hide the white background layer and merge
visible.
I always resize my finished tag BEFORE adding my copyright info,
it makes this seem clearer, add your name and copy right
information and Save the way you prefer to save tags,
I hope you enjoyed this tut
smiles
christy

Monday, February 10, 2014

Sweet Heart
Tube of choice, I used Caron Vinson and Rion Vernon
Scrap kit of choice, I used Sweet Hearts by X-Clusively Christy Scraps
Font of choice, I used A&S Snapper Script
Graphic Program of choice, I use PSP 9
This tutorial assumes you have working knowledge of paint
shop pro, All of my tutorials are my own creation
and any similarity with any other tutorial is purely coincidential.
Please do not copy my tutorials to anyplace, please link back to my blog!
Open a new image 750x750 and flood fill white,
I Like to have room to work, this is your choice,
My tuts are written using this size image
open xcd-sweethearts-paper3 resize by 21%
(I am using my full size kit) apply a mask of
choice I used WSL_Mask173 now open
paper 14 resize like above and apply WSL_Mask202
Now open sweethearts-greenery2 c/p as a
new layer resize by 45% open sweethearts-greenery4
c/p as a new layer and resize by 42% duplicate mirror
and the flip, arrange to your liking. Now open
sweethearts-greenery3 c/p as a new layer
and resize by 25% duplicate, mirror and rotate to
the left by 45% open sweethearts-frame7 c/p as a
new layer and resize by 48% and rotate to the
right by 9% click inside the frame opening and
expand by 6 invert and open sweethearts-paper2
resize by 21% and c/p below the frame hit delete
and select none. Open sweethearts-ribbon2 c/p
as a new layer mirror and resize by 35%,
now open sweethearts-ribbon1 c/p as a new
layer and resize by 40% and flip arrange
along the bottom of the frame, open
sweethearts-beads and c/p as a new layer,
resize by 35% place below the ribbons,
duplicate and mirror and flip place this one
above the ribbons layer, now open
sweethearts-flower4 c/p as a new layer
resize by 35% arrange to your liking,
open sweethearts-flower8 c/p as a new layer
and resize by 35% mirror, open sweethearts-cookie1
c/p as a new layer and resize by 35% and
then rotate to the left by 12 now open sweethearts-candy4
c/p as a new layer and resize by 20% open sweethearts-candy1
c/p as a new layer and resize by 30% and rotate to
the right by 9 now add a dropshadow and a tube of choice,
hide the white background layer and merge visible.
I always resize my finished tag BEFORE adding my copyright info,
it makes this seem clearer, add your name and copy right information and
Save the way you prefer to save tags,
I hope you enjoyed this tut
smiles
christy
Ü

Friday, September 20, 2013

Halloween Witch
Tube of choice, I used Zindy S.D. Nielsen and Rion Vernon
Scrap kit of choice, I used Halloween by X-Clusively Christy Scraps
Font of choice, I used Cherish
Graphic Program of choice, I use PSP 9
This tutorial assumes you have working knowledge of paint shop pro,
All of my tutorials are my own creation and any similarity
with any other tutorial is purely coincidential.
Please do not copy my tutorials to anyplace, please link back to my blog!
Open a new image 750x750 and flood fill white,
I Like to have room to work, this is your choice,
My tuts are written using this size image
I always use the full size kit if it is avaliable.
Open paper 12 and resize by 750x750 smartsize and c/p as
a new layer, apply a mask of choice, I used WSL_Mask353
merge group.
Now open frame3 and c/p as a new layer, resize by 60%
and rotate to the right by 6, grab your magic wand and click
inside the frame opening, and expand by 9 and invert, open
paper5 resize by 750x750 and c/p as a new layer below the
frame and hit delete, select none, now open bloodmoon
and c/p as a new layer, arrange to right above the mask layer
and resize by 40% move it up towards the right a bit, now
open the bat and c/p as a new layer, bring this to the top
and resize by 28% and then rotate to the left by 11
place towards the moon, now open the twig and c/p as
a new layer, resize by 44% and arrange to your liking, open
greenery1 c/p as a new layer again place this right above your
mask layer, resize by 42% mirror and flip, open greenery3
c/p as a new layer and rotate to the right by 72% and then
resize by 68%, now open leaves and c/p as a new layer
bring to the top and resize by 38% and then rotate to the
left by 90% now open ribbon2 and c/p as a new layer
place this right above the frame layer and resize by 38%
and then rotate to the left by 9, now open ricrac1 c/p as
a new layer and resize by 48%, now open leaf4 c/p as a
new layer and resize by 25% place under your leaves layer
I duplicated, flipped and mirrored mine,open leaf1 and c/p
as a new layer, place below your duplicated leaf layers, and
resize by 30% and mirror, rotate right by 21% duplicate and
flip, duplicate and mirror and flip again, now open the spider
c/p as a new layer and resize by 24% place to your liking,
open the skull and c/p as a new layer, resize by 30% open
the spellbook and c/p as a new layer below the skull and
resize by 35% mirror and rotate to the right by 21 now add
a dropshadow and tube of choice, hide the white background
layer and merge visible.
I always resize my finished tag BEFORE adding my copyright info,
it makes this seem clearer, add your name and copy right
information and Save the way you prefer to save tags,
I hope you enjoyed this tut
smiles
christy
Ü
Tube of choice, I used Zindy S.D. Nielsen and Rion Vernon
Scrap kit of choice, I used Halloween by X-Clusively Christy Scraps
Font of choice, I used Cherish
Graphic Program of choice, I use PSP 9
This tutorial assumes you have working knowledge of paint shop pro,
All of my tutorials are my own creation and any similarity
with any other tutorial is purely coincidential.
Please do not copy my tutorials to anyplace, please link back to my blog!
Open a new image 750x750 and flood fill white,
I Like to have room to work, this is your choice,
My tuts are written using this size image
I always use the full size kit if it is avaliable.
Open paper 12 and resize by 750x750 smartsize and c/p as
a new layer, apply a mask of choice, I used WSL_Mask353
merge group.
Now open frame3 and c/p as a new layer, resize by 60%
and rotate to the right by 6, grab your magic wand and click
inside the frame opening, and expand by 9 and invert, open
paper5 resize by 750x750 and c/p as a new layer below the
frame and hit delete, select none, now open bloodmoon
and c/p as a new layer, arrange to right above the mask layer
and resize by 40% move it up towards the right a bit, now
open the bat and c/p as a new layer, bring this to the top
and resize by 28% and then rotate to the left by 11
place towards the moon, now open the twig and c/p as
a new layer, resize by 44% and arrange to your liking, open
greenery1 c/p as a new layer again place this right above your
mask layer, resize by 42% mirror and flip, open greenery3
c/p as a new layer and rotate to the right by 72% and then
resize by 68%, now open leaves and c/p as a new layer
bring to the top and resize by 38% and then rotate to the
left by 90% now open ribbon2 and c/p as a new layer
place this right above the frame layer and resize by 38%
and then rotate to the left by 9, now open ricrac1 c/p as
a new layer and resize by 48%, now open leaf4 c/p as a
new layer and resize by 25% place under your leaves layer
I duplicated, flipped and mirrored mine,open leaf1 and c/p
as a new layer, place below your duplicated leaf layers, and
resize by 30% and mirror, rotate right by 21% duplicate and
flip, duplicate and mirror and flip again, now open the spider
c/p as a new layer and resize by 24% place to your liking,
open the skull and c/p as a new layer, resize by 30% open
the spellbook and c/p as a new layer below the skull and
resize by 35% mirror and rotate to the right by 21 now add
a dropshadow and tube of choice, hide the white background
layer and merge visible.
I always resize my finished tag BEFORE adding my copyright info,
it makes this seem clearer, add your name and copy right
information and Save the way you prefer to save tags,
I hope you enjoyed this tut
smiles
christy
Ü

Friday, September 6, 2013

Witches Brew
Tube of choice, I used Caron Vinson and Elias Chatzoudis
Scrap kit of choice, I used Witches Brew by x-clusively christy scraps
Font of choice, I used Times Old Attic
Graphic Program of choice, I use PSP 9
This tutorial assumes you have working knowledge of paint shop pro,
All of my tutorials are my own creation and any similarity
with any other tutorial is purely coincidential.
Please do not copy my tutorials to anyplace, please link back to my blog!
I always use the full size kit if it is avaliable
Open a new image 750x750 and flood fill white,
I Like to have room to work, this is your choice,
My tuts are written using this size image
open paper18 resize by 21% (smartsize) and c/p
as a new layer, apply a mask of choice, I used
Vix_MaskHalloween0904 merge group
I then used paper 8 resized by 21% and applied
WSL_mask44
Now lets open frame1 and c/p as a new layer
resize by 56% rotate to the left by 9% and grab
your magic wand, click inside the frame opening
and expand by 9 now invert, and open paper 12
resize by 15% c/p as a new layer and hit delete
now open the web and c/p as a new layer right
above the paper resize by 45% and place in
the frame, hit delete (do not dropshadow the web)
select none, open ribbon3 c/p as a new layer
resize by 56% now open driedgreenery2 c/p
below the ribbon and resize by 43% and rotate
to the right by 15% now open driedgreenery1
c/p as a new layer, move to right above your
mask layer and resize by 43% duplicate and
mirror. rotate to the right by 21% now open
leaves c/p as a new layer again right above
the mask layer, resize by 40% and then flip it
now rotate to the right by 21% now paste again
resize by 40% mirror and rotate to the left by
21%. Now open leaf2 c/p as a new layer
arrange to right below the ribbon layer and
resize by 35% duplicate and mirror, now open
the snake and c/p as a new layer, bring to the
top and resize by 43% and then rotate to the
right by 18% I duplicated mine and placed one
below the ribbon, now on the original erase what
you want "twined" with the ribbon. Now open
flower 3 c/p as a new layer and resize by 22%
place right above your leaves layer, open flower 5
and resize by 30% place below the other
flower, open flower 4 and c/p below the leaf layer
and resize by 30% now open the raven and c/p
as a new layer, resize by 24% place to your liking
now add a dropshadow and tube or tubes of choice
hide the white background layer and merge visible.
I always resize my finished tag BEFORE adding my copyright info,
it makes this seem clearer, add your name and copy right
information and Save the way you prefer to save tags,
I hope you enjoyed this tut
smiles
christy
Ü

Thursday, August 22, 2013
 Touch of Fall
Tube of choice, I used Caron Vinson and Rion Vernon
Scrap kit of choice, I used Touch of Fall by X-Clusively Christy Scraps
Font of choice, I used Plumage
Graphic Program of choice, I use PSP 9
This tutorial assumes you have working knowledge of paint shop pro,
All of my tutorials are my own creation and any similarity
with any other tutorial is purely coincidental.
Please do not copy my tutorials to anyplace, please link back to my blog!
I also always use the full size kit in my tutorial if it avaliable
Open a new image 750x750 and flood fill white,
I Like to have room to work, this is your choice,
My tuts are written using this size image
open paper12 resize by 700x700 and c/p as a new layer
apply a mask of choice, I used WSL_Mask362 merge group.
Now open frame 7 and c/p as a new layer, resize by 54%
and then rotate to the left by 6%. Grab your magic wand and
click inside the frame opening and expand by 9% and invert,
open paper 7 and c/p as a new layer below the frame, hit
delete and select none. now open greenery6 c/p as a new layer
resize by 47% and rotate to the left by 6% arrange along the
bottom of the frame, now open greenery7 c/p as a new layer
place below the frame and paper layer and resize by 47%
duplicate and mirror, I did this a total of 4 times now open
greenery 1 c/p as a new layer right above the frame layer
resize by 36% and rotate to the left by 9% duplicate and
then mirror and rotate left by 9%. Now open greenery 3
c/p as a new layer and resize by 36% duplicate and mirror
rotate to the right by 18% now open ribbon 3 c/p as a new
layer, I moved mine down under the twig/leaves layer, and
resize by 45% now open bow 5 c/p as a new layer and bring
to the top, resize by 45%, now open birdhouse2 c/p as a
new layer, arrange to right above the frame layer and resize
by 35% rotate to the left by 9%, now open bird (the pigeon)
c/p as a new layer and resize by 24% and mirror. arrange to your
liking. Now open flower 6 c/p as a new layer place right above
your frame layer, resize by 30% duplicate and move this one
down to right above the mask layer, now open flower 9 c/p
as a new layer, arrange to right above the frame layer and resize
by 40% arrange to your liking, now add a dropshadow and
tube or tubes of choice, hide the white background layer
and merge visible.
I always resize my finished tag BEFORE adding my copyright info,
it makes this seem clearer, add your name and copy right
information and Save the way you prefer to save tags,
I hope you enjoyed this tut
smiles
christy
Ü

Monday, August 12, 2013

Apple Pie
Tube of choice, I used Pinuptoons and Caron Vinson
Scrap kit of choice, I used Apple Pie by Me (full size used in tut)
Font of choice, I used Studio Lettering Swing
Graphic Program of choice, I use PSP 9
This tutorial assumes you have working knowledge of paint shop pro,
All of my tutorials are my own creation and any similarity
with any other tutorial is purely coincidential.
Please do not copy my tutorials to anyplace, please link back to my blog!
Open a new image 750x750 and flood fill white,
I Like to have room to work, this is your choice,
My tuts are written using this size image
Open Apple Pie paper 20 resize by 700x700 smartsize
and c/p as a new layer, apply a mask of choice, I used
Artmama Mask 06, Merge group
Now lets open ap-frame3 c/p as a new layer and resize by
60% now grab your magic wand and click inside the frame
opening and expand by 9, invert. Now open ap-paper 14
resize by 700x700 smartsize c/p as a new layer below
the frame and hit delete, select none. Now lets open
ap-greenery4 c/p as a new layer right above your
mask layer, resize by 50% and rotate to the right by
36% move towards the right of your tag, duplicate and
then mirror, Now open ap-greenery3 c/p as a new layer
again right above the mask layer, resize by 50% move
to the right a bit and then duplicate and mirror. Now open
ap-leaf2 c/p as a new layer, place above your first greenery
layer, resize by 26% I duplicated mine a couple times and
rotated them to fill in, now open ap-apples1 c/p as a new
layer bring to the top and resize by 34% arrange to your
liking, now open ap-applebasket2 c/p as a new layer, move
down below the other apples and resize by 28%. Now
open ap-ribbon6 c/p as a new layer right above your
frame layer, resize by 54% and then rotate to the left
by 65% arrange to your liking, open ap-ribbon2 c/p as
a new layer, resize by 36% arrange below the other ribbon
open ap-butterfly1 c/p as a new layer, resize by 26% and
again by 72%, rotate to the left by 15% I duplicated mine and
mirrored it and placed it near the bottom of my tag as well
now add a dropshadow and tube of choice, hide the white
background layer and merge visible.
I always resize my finished tag BEFORE adding my copyright info,
it makes this seem clearer, add your name and copy right
information and Save the way you prefer to save tags,
I hope you enjoyed this tut
smiles
christy
Ü

Wednesday, September 12, 2012

Bubble Bubble Toil and Trouble
Tube of choice, I used Elias Chatzoudis and Rion Vernon
Scrap kit of choice, I used Toil and Trouble by x-clusively christy scraps
(Full size kit used for tutorial)
Font of choice, I used Ashbury (with eyecandy drip applied)
Graphic Program of choice, I use PSP 9
This tutorial assumes you have working knowledge of paint shop pro,
All of my tutorials are my own creation and any similarity
with any other tutorial is purely coincidential.
Please do not copy my tutorials to anyplace, please link back to my blog!
Open a new image 750x750 and flood fill white,
I Like to have room to work, this is your choice,
My tuts are written using this size image
Open xcd-tt-paper17 resize by 19% (I ALWAYS use smartsize)
c/p as a new layer and apply a mask of choice, I used
Vix_FreebieMaskOct11No2
Now open xcd-tt-frame2 c/p as a new layer, resize by
56% grab your magic wand, click inside the frame opening
and expand by 9, invert. open xcd-tt-paper13 resize by 19%
and c/p as a new layer below the frame, arrange where you
would like and hit delete, select none, now open xcd-tt-greenbubbles
c/p as a new layer, I placed mine above the mask, resize by
48%. I duplicated and flipped and then mirrored mine
now open xcd-tt-cauldronbubbles c/p as a new layer, resize
by 48%, now open xcd-tt-spookytree c/p as a new layer and
place this right above the bubbles layer, resize by 72%
now open xcd-tt-riibon6 c/p as a new layer, below the
couldron, resize by 43% and then rotate left by 12
now open xcd-tt-ribbon2 c/p as a new layer and mirror
resize by 43% now open xcd-tt-moon2 c/p as a new layer
arrange to right above the mask layer and resize by 35%
now open xcd-tt-potion1 and c/p as a new layer, resize by
16% I did the same with potion 2 and 3, Now lets open
xcd-tt-googlyeyes c/p as a new layer right above the
frame, resize by 21%, I placed mine behind the cauldron
I duplicated and resized this one by 72% and then mirrored
and rotated left by 12% now open xcd-tt-cat c/p as a new
layer, resize by 35% now open xcd-tt-pumpkin2 c/p as
a new layer, resize by 28% place right above your cauldron
layer, now open xcd-tt-flair2 c/p as a new layer and
resize by 28% and rotate to the left by 15% arrange
below your cat layer, open xcd-tt-flair1 c/p as a new
layer and resize by 28% and rotate to the right by 15%
now add a dropshadow of choice and a tube of choice
hide the white background layer and merge visible.
I always resize my finished tag BEFORE adding my copyright info,
it makes this seem clearer, add your name and copy right
information and Save the way you prefer to save tags,
I hope you enjoyed this tut
smiles
christy
Ü

Tuesday, September 4, 2012

Merlot
Tube of choice, I used Rion Vernon and Gennadiy Koufay
Scrap kit of choice, I used Merlot by X-Clusively Christy Scraps
Font of choice, I used Studio Lettering Swing
Graphic Program of choice, I use PSP 9
This tutorial assumes you have working knowledge of paint shop pro,
All of my tutorials are my own creation and any similarity
with any other tutorial is purely coincidential.
Please do not copy my tutorials to anyplace, please link back to my blog!
Open a new image 750x750 and flood fill white,
I Like to have room to work, this is your choice,
My tuts are written using this size image
Open xcd-m-paper5 resize by 19% and c/p as a new layer
apply a mask of choice, I used mask126_by_nb2007
Now open xcd-m-frame6 c/p as a new layer and resize by
resize by 50% and rotate to the left by 12% grab your magic
wand, click inside the frame opening and expand by 9, invert
open xcd-m-paper12 resize by 19% and c/p as a new layer
below the frame, hit delete and select none. now open
xcd-m-leaf5 c/p as a new layer, arrange to right above
the mask layer, resize by 35% and flip, I duplicated mine
and then rotated it to the left by 36%, now lets open
xcd-m-greenery4 c/p as a new layer, bring to the top
and resize by 45% and rotate to the right by 75%
paste again, this time resize by 55% drag it below
the frame and paper fill layer, Now open xcd-m-woodtwist2
c/p as an new layer, bring to the top and resize by 40%
and then mirror, now open xcd-m-ribbon5 c/p as a new
layer, arrange to right above the frame layer and resize
by 75%, now mirror, open xcd-m-books. c/p as a new
layer and resize by 50% and mirror, now lets open
xcd-m-apple1 c/p as a new layer and resize by 16%
open xcd-m-bottle1 c/p as a new layer and resize by
20% arrange below your apple, now open xcd-m-flower4
c/p as a new layer and resize by 28% arrange below your
grape leafe layer, now open xcd-m-flower6 c/p as a new
layer and resize by 28% and mirror, arrange below the
brown flower layer, open xcd-m-envelope, c/p as a new
layer, resize by 28% and then place near your books
and bottle, now open xcd-m-merlot c/p as a new layer
arrange to right above the frame layer and resize by
30% now open xcd-m-wineglass1 c/p as a new layer,
resize by 30% and mirror, now open xcd-m-butterfly
c/p as a new layer and resize by 22% rotate to the
left by 12%, place to your liking, now add a drop
shadow and tube of choice, hide the white background
layer and merge visible.
I always resize my finished tag BEFORE adding my copyright info,
it makes this seem clearer, add your name and copy right
information and Save the way you prefer to save tags,
I hope you enjoyed this tut
smiles
christy
Ü

Sunday, August 12, 2012

Schools Back in Session!
Tube of choice, I used Rion Vernon and TooshToosh
Scrap kit of choice, I used School Day's By X-Clusively Christy Scraps
(Full Size Kit used in tutorial)
Font of choice, I used LHF Basher
Graphic Program of choice, I use PSP 9
This tutorial assumes you have working knowledge of paint shop pro,
All of my tutorials are my own creation and any similarity
with any other tutorial is purely coincidential.
Please do not copy my tutorials to anyplace, please link back to my blog!
Open a new image 750x750 and flood fill white,
I Like to have room to work, this is your choice,
My tuts are written using this size image
Open xcd-sd-paper13 resize by 19% c/p as a new layer
and apply a mask of choice, I used a mask I have in
my collection that is just a number (0504) I have no idea
who the creator is of this mask, any good smudgy edge
mask will work well
now lets open xcd-sd-blackboard, c/p as a new layer and
resize by 50%, Open xcd-sd-book. c/p as a new layer and
resize by 28% arrange to your liking, open xcd-sd-brushes
c/p as a new layer and resize by 20% arrange with your book
open xcd-sd-coloredpencils, c/p as a new layer and resize by
17% arrange to right above the chalkboard, open xcd-sd-clock
c/p as a new layer, resize by 28% place near the top right
of the chalk board, open xcd-sd-apple c/p as a new layer and
resize by 25% place below the book layer, open xcd-sd-coloredpencil
of choice, c/p as a new layer and resize by 15% and then
rotate to the left by 36% place so it "leans" on the book,
now open xcd-sd-flair1 c/p as a new layer, and resize by
12% rotate left by 36% and lean it on the edge of the book,
open xcd-sd-erasers c/p as a new layer and resize by
15% mirror and place near your book as well, open
xcd-sd-ruler c/p as a new layer, resize by 22%, now open
xcd-sd-pinred c/p as a new layer and resize by 12% now
open xcd-sd-crayonred c/p as a new layer and resize by
12% now open xcd-sd-crayongreen c/p as a new layer and
resize by 12% rotate to the right by 36% lay it on the red
crayon, open xcd-sd-ribbon3 c/p as a new layer arrange
this to right above the mask layer, resize by 30% place
near the bottom left of the tag, now open xcd-sd-ricrac2
c/p as a new layer, arrange to right above the chalkboard
and resize by 30% open xcd-sd-ricrac1 c/p as a new layer
resize by 30% and rotate right by 15%. now you can add
a note on the chalkboard, or your name etc. add a tube of
choice, and a dropshadow of choice, hide the white background
layer and merge visible.
I always resize my finished tag BEFORE adding my copyright info,
it makes this seem clearer, add your name and copy right
information and Save the way you prefer to save tags,
I hope you enjoyed this tut
smiles
christy
Ü

Wednesday, August 1, 2012

Howdy Yall
Tube of choice, I used Amy Matthews and Elias Chatzoudis
Scrap kit of choice, I used Hick Town by me (full size used)
Font of choice, I used RamblerScriptJF
Graphic Program of choice, I use PSP 9
This tutorial assumes you have working knowledge of paint shop pro,
All of my tutorials are my own creation and any similarity
with any other tutorial is purely coincidential.
Please do not copy my tutorials to anyplace, please link back to my blog!
Open a new image 750x750 and flood fill white,
I Like to have room to work, this is your choice,
My tuts are written using this size image
open xcd-ht-paper9 resize by 19% and c/p as a new
layer, apply a mask of choice, I used WSL_Mask3
now open xcd-ht-wire c/p as a new layer and resize by
56%, now open xcd-ht-woodframe, c/p as a new layer
resize by 56% and rotate to the left by 6 grab your magic
wand, click inside the frame opening and expand by 9
invert and open xcd-ht-paper6 resize by 19% and c/p
as a new layer below your frame, hit delete and select none,
now open xcd-ht-leatherstring c/p as a new layer and
resize by 50% and arrange to your liking, now open
xcd-ht-cactus2 c/p as a new layer and resize by 36%
now open xcd-ht-barrels c/p as a new layer below the
cactus, resize by 37% now open xcd-ht-dirt c/p as a
new layer, arrange to right above the mask layer and
resize by27% now duplicate and mirror, arrange to your
liking, now open xcd-ht-flower8 c/p as a new layer and
resize by 22% mirror and rotate right by 6 open
xcd-ht-flower3 c/p as a new layer and resize by 20%
arrange with your other flower, open xcd-ht-flower1
c/p as a new layer and resize by 20%, now lets open
xcd-ht-rope c/p as a new layer, arrange below your
flower layers and resize by 36%, now lets open
xcd-ht-greenery1 c/p as a new layer, arrange layer
to right above the wire layer, resize by 45% mirror
and rotate to the right by 90%, I duplicated mine
and then rotated this one to the right by 15% arrange
to your liking, now open xcd-ht-greenery5 c/p as a
new layer above the other greenery, mirror and resize
by 45%, again I duplicated mine and rotated to the
right by 90%, now lets open xcd-ht-hat2 c/p as a new
layer resize by 34%, mirror and rotate to the right
by 32, "hang" it on the top right of your frame,
now open xcd-ht-longgun, c/p as a new layer resize
by 42% and rotate left by 108% arrange to your
liking, open xcd-ht-pistol2 c/p as a new layer,
resize by 22% now rotate to the right by 45%
arrange to your liking, now open xcd-ht-saddle
c/p as a new layer, mirror, arrange to right above
the barrels layer and resize by 35%, now open
xcd-ht-badge c/p as a new layer, bring to the
top and resize by 19%, arrange to your liking, now
open xcd-ht-splat1 c/p as a new layer, resize by 35%
arrange this to right above the dirt layers, I duplicated
mine a few times, I then pasted it again this time
right above the mask layer, I duplicated, mirrored
and flipped it, I lightened it a bit as well with gamma
correction tool, now add a dropshadow and tube
of choice, hide the white background layer and
merge visible.
I always resize my finished tag BEFORE adding my copyright info,
it makes this seem clearer, add your name and copy right
information and Save the way you prefer to save tags,
I hope you enjoyed this tut
smiles
christy
Ü

Sunday, May 20, 2012

Picture This!!
Tube of choice, I used Rion Vernon and Amy Matthews
Scrap kit of choice, I used Old Photos by X-Clusively Christy Designs
full size kit used in this tut
Font of choice, I used AS Snapper Script
Graphic Program of choice, I use PSP 9
This Tutorial is dedicated to a sweet lady who
gifted me the Amy Matthews tube thank you
so much Zuzz for your generous heart!!!
This tutorial assumes you have working knowledge of paint shop pro,
All of my tutorials are my own creation and any similarity
with any other tutorial is purely coincidential.
Please do not copy my tutorials to anyplace, please link back to my blog!
Open a new image 750x750 and flood fill white,
I Like to have room to work, this is your choice,
My tuts are written using this size image
open xcd-op-paper13 resize by 19% and c/p as a new
layer, apply a mask of choice, I used zuzzanna_mask05
now rotate to the left by 6% move a bit to the left
duplicate and mirror.
Now open xcd-op-photoframe2 c/p as a new layer
resize by 62% now rotate to the left by 6% grab your
magic wand click inside the frame opening and expand
by 9% and then invert, open xcd-op-paper12 resize by
19% and c/p below the frame, hit delete select none,
now open xcd-op-photocorner c/p as a new layer
resize by 17% duplicate and flip and then mirror,
rotate to match your frame layer,
now open xcd-op-greenery5 c/p as a new layer
arrange right above the mask layer, resize by 43%
now paste again this time make it the top layer
and resize by 35% and then flip it, now open
xcd-op-greenery4 c/p as a new layer, resize by
35% arrange to right above the mask layer
I duplicated mine and rotated it to the right
by 90%, now lets open xcd-op-greenery1 c/p
as a new layer, right above the mask layer and
resize it by 28%, duplicate and flip, and then duplicate
again, arrange to your liking. open xcd-op-glasses
c/p as a new layer, bring to the top and resize
by 38% arrange with the greenery, now open
xcd-op-flower1 c/p as a new layer below the glasses
resize by 37% and then mirror, now open
xcd-op-flower3 c/p as a new layer below the other
flower and resize by 30% flip, now lets open
xcd-op-flower5 c/p as a new layer, mirror and
then resize by 38% and then rotate to the right
by 90%, I pasted mine again, resized the same
and then rotated to the left by 125% I moved
this to right above the greenery that is below
the frame layer, now open xcd-op-driedrose
c/p as a new layer, mirror and rotate to the right
by 12% and then resize by 37% arrange below
all the other flowers, now open xcd-op-ribbon2
c/p as a new layer, arrange to right above the
greenery but below your flowers, resize by
45% I then added ribbon1 resized by 45% and
recolored to match the pink flower. now open
xcd-op-postage and c/p as a new layer
arrange right above the mask layer and
resize by 40% place near the top right,
now open xcd-op-tulle and c/p as a new
layer, arrange to right above the frame and
resize by 55%, now open xcd-op-pocketwatch
c/p as a new layer, bring to the top and resize
by 36% and then rotate to the right by 15%
now open xcd-op-camera c/p as a new layer
40% arrange below your glasses and pocket
watch, now add a dropshadow and tube of
choice, hide the white background layer and
merge visible.
I always resize my finished tag BEFORE adding my copyright info,
it makes this seem clearer, add your name and copy right
information and Save the way you prefer to save tags,
I hope you enjoyed this tut
smiles
christy
Ü

Saturday, March 10, 2012

May an Angel Watch over You
This tut is dedicated to my Wonderful friends,
Those that have always been
there for me, and I hope they all
know I am always here for them!
Tube of choice, I used Rion Vernon and Zindy Nielsen
Scrap used My Friends by X-Clusively Christy Scraps
Font of choice I used Majestic
Graphic Program of choice, I use PSP 9
This tutorial assumes you have working knowledge of paint shop pro,
All of my tutorials are my own creation and any similarity
with any other tutorial is purely coincidential.
Please do not copy my tutorials to anyplace, please link back to my blog!
Open a new image 850x850 and flood fill white,
I Like to have room to work, this is your choice,
My tuts are written using this size image
open xcd-mf-paper5 resize by 19% and c/p as a new layer
apply a mask of choice, I used WSLmask254
Now lets open xcd-mf-frame7 c/p as a new layer
resize by 43% grab your magic wand and click inside
the frame opening, expand by 9 and invert, now open
a paper of choice, I used xcd-mf-paper22 resized by
19%, c/p as a new layer below the frame, hit delete
and select none, now open xcd-mf-framewrap and resize
by 59% arrange to your liking on the frame, now open
xcd-mf-greenery10 c/p as a new layer, resize by 36%
place this layer right above your mask layer and near
the top right of the frame, now open xcd-mf-greenery9
c/p as a new layer resize by 50% and then flip, place
this below the ribbon layer, now open xcd-mf-greenery7
c/p as a new layer, resize by 42% flip and mirror and
then rotate to the right by 11 placing this with the other
grass blade, now open xcd-mf-greenery3 c/p as a new
layer, resize by 38% and then mirror, now rotate to
the left by 84%, I placed this below the frame and
paper, I then pasted again resizing the same and then
placed this along the bottom edge of the frame, now
lets open xcd-mf-flower10 c/p as a new layer, I placed
this layer right above the frame layer, resize by 33%
now open xcd-mf-flower6 c/p as a new layer resize by
24% now mirror, Now open xcd-mf-flower8 c/p as a
new layer and resize by 35%, Now lets open xcd-mf-flair1
c/p as a new layer bring to the top and resize by 22%
place with your flowers, I then added xcd-mf-flair7 resized
the same tucked behind the flowers,now open xcd-mf-bird1
c/p as a new layer and mirror, resize by 36% I placed
mine along the edge of the frame, now add a dropshadow
and a tube of choice, hide the white background and merge
visible.
I always resize my finished tag BEFORE adding my copyright info,
it makes this seem clearer, add your name and copy right
information and Save the way you prefer to save tags,
I hope you enjoyed this tut
smiles
christy
Ü

Tuesday, February 21, 2012

Soft and Pink
Tube of choice, I used Marco Guaglione and Rion Vernon
Scrap used Soft Love by X-Clusively Christy Scraps
(Full Size Kit Used in Tut)
Font of choice I used Mon Amour Script Pro
Graphic Program of choice, I use PSP 9
This tutorial assumes you have working knowledge of paint shop pro,
All of my tutorials are my own creation and any similarity
with any other tutorial is purely coincidential.
Please do not copy my tutorials to anyplace, please link back to my blog!
Open a new image 750x750 and flood fill white,
I Like to have room to work, this is your choice,
My tuts are written using this size image
Open xcd-sl-paper16 resize by 21% and c/p as a
new layer, apply a mask of choice, I used mask
211InsatiableDreams
Now lets open xcd-sl-frame5 c/p as a new layer and
resize by 46% now rotate to the left by 6%, now open
xcd-sl-paper6 resize by 21%, grab your magic wand and
click inside the frame opening, expand by 9 and invert,
now c/p the paper below the frame, place to your liking
and hit delete, select none, now lets open xcd-sl-greenery2
c/p as a new layer below this paper, resize by 40% now
mirror and rotate to the left by 90% place to your liking
now open xcd-sl-greenery1 c/p as a new layer, mirror
and then resize by 40% place with your other greenery
I pasted it again this time above my frame, and then
resize by 32% and rotated to the right by 74%
I duplicated and mirrored it, placing the two together
Now open xcd-sl-greenery4 c/p as a new layer, place
this above the mask layer and resize by 34% I duplicated
mine a few times, and also rotated it a bit to fill the
corner up a bit, I then pasted it again, and flipped it,
then rotated it to the right by 45 now resize by 50%
arrange to your liking, again I duplicated mine and flipped
and rotated this one a bit too, now lets open xcd-sl-wireheart
c/p as a new layer, bring to the top and resize by 18%
and then rotate to the left by 12% place with the greenery
at the bottom left of the frame, Now open xcd-sl-envelope
c/p as a new layer, resize by 24% and then rotate to
the left by 12%, place with the greenery and wireheart,
Now open xcd-sl-string1 c/p as a new layer right above
your frame layer, resize by 45%, now open xcd-sl-string2
c/p as a new layer, resize by 32% and then mirror and flip
now rotate to the left by 45%, now duplicate and resize
this one by 50% rotate to the left by 90%, duplicate and
flip arrange these two with the greenery, now lets open
xcd-sl-rose2 c/p as a new layer, bring to the top and resize
by 26% now open xcd-sl-rose3 c/p as a new layer mirror
and resize by 29% place below the other rose, now paste
again and mirror, drop below the rose you just placed and
flip, resize by 38% and then rotate to the left by 18%
Now open xcd-sl-flowers1 c/p as a new layer, arrange to
right above the greenery that is above the frame, resize by
30% place on the far left, now open xcd-sl-flower5
c/p as a new layer, bring this to the top and resize by 28%
now add a dropshadow of choice and a tube of choice
hide the white background layer and merge visible.
I always resize my finished tag BEFORE adding my copyright info,
it makes this seem clearer, add your name and copy right
information and Save the way you prefer to save tags,
I hope you enjoyed this tut
smiles
christy
Ü

Wednesday, November 23, 2011

Santa's Little Cookies
Tube of choice, I used Suzanne Woolcott and Elias Chatzoudis
Scrap used Cookies For Santa by X-Clusively Christy Scraps
full size kit used in this tutorial
Font of choice I used Reklame Script Reg
Graphic Program of choice, I use PSP 9
This tutorial assumes you have working knowledge of paint shop pro,
All of my tutorials are my own creation and any similarity
with any other tutorial is purely coincidential.
Please do not copy my tutorials to anyplace, please link back to my blog!
Open a new image 750x750 and flood fill white,
I Like to have room to work, this is your choice,
My tuts are written using this size image
Open xcd-cfs-paper16 resize by 20% and c/p as a new layer
apply a mask of choice, I used MontiBlindsMask1
merge group and then rotate to the left by 45%
Now lets open xcd-cfs-frame6 c/p as a new layer and resize
by 60% and move up towards the right, duplicate and mirror
place this one towards the bottom left, grab your magic wand
and click inside the frame opening (we will do this to each frame)
expand by 9 and then invert, now open xcd-cfs-paper13 resize by
20% and c/p as a new layer below the frame you are working on
hit delete and select none, go to the other frame layer and do
the same with the same paper (if you want) now lets open
xcd-cfs-giftbag c/p as a new layer, resize by 44% and then
mirror, now open xcd-cfs-cookie7 c/p as a new layer resize by
22% and place near your goodie bag, now open xcd-cfs-cookie6
c/p as a new layer and resize by 22% and then mirror, now open
xcd-cfs-cookie3 c/p as a new layer and resize by 12% I placed
this one below my sleigh cookie so it looks to be "IN" the sleigh
continue to add the cookies of your choice until you have as
many as you like, Now open xcd-cfs-cupojoe c/p as a new
layer and resize by 18% and mirror place with your cookies
now lets open xcd-cfs-greenery1 c/p as a new layer, arrange
this to right above the mask layer and then resize by 42%
now duplicate and mirror and then rotate to the left by 18%
now open xcd-cfs-marshmellow c/p as a new layer bring to
the top and resize by 13% I duplicated and mirrored mine
and placed them near the cup, now open xcd-cfs-snowflake2
c/p as a new layer right above your greenery layer and resize
by 25% I duplicated mine a couple times spreading them
around, now open xcd-cfs-string c/p as a new layer
arrange to right above the mask layer and resize by 50%
When you are happy with your tag apply a dropshadow
of choice and a tube or tubes of choice, hide the white
background layer and merge visible.
I always resize my finished tag BEFORE adding my copyright info,
it makes this seem clearer, add your name and copy right
information and Save the way you prefer to save tags,
I hope you enjoyed this tut
smiles
christy
Ü

Monday, October 31, 2011

A Beautiful Frosted Fall
Tube of choice, I used Lia and Rion Vernon
Scrap used Frosted Fall by x-clusively christy scraps
full size kit used for this tutorial
Font of choice I used FleurDeLeah
Graphic Program of choice, I use PSP 9
This tutorial assumes you have working knowledge of paint shop pro,
All of my tutorials are my own creation and any similarity
with any other tutorial is purely coincidential.
Please do not copy my tutorials to anyplace, please link back to my blog!
Open a new image 750x750 and flood fill white,
I Like to have room to work, this is your choice,
My tuts are written using this size image
open xcd-ff-paper8 resize by 19% c/p as a new layer and
apply a mask of choice, I used Vix_BigMask001
Now open xcd-ff-frame-2 c/p as a new layer and resize by
45%, grab your magic wand and click inside the frame
opening, expand by 9 and invert, open xcd-ff-paper1 resize
by 19% and c/p as a new layer, hit delete and select
none, now open xcd-ff-snowtree c/p as a new layer,
arrange to above your mask and resize by 50%, I
erased the little bit that was showing BELOW the frame
now open xcd-ff-lightleaves2 c/p as a new layer, resize
by 35% and mirror place near the bottom right of
the frame, now lets open xcd-ff-leaf9 c/p as a new
layer, resize by 25% and mirror, now open xcd-ff-leaf3
c/p as a new layer and resize by 25% and mirror,
now open xcd-ff-driedgrass c/p as a new layer,
place this right above your tree layer and resize by
35% duplicate and mirror, now open xcd-ff-branch3
c/p as a new layer, place right above your frame
and resize by 35%, now open xcd-ff-pinecone c/p
as a new layer, resize by 18%, now open xcd-ff-nut
c/p as a new layer and resize by 15%, now open
xcd-ff-mushroom c/p as a new layer, arrange
below your nut layer and resize by 20%, now
open xcd-ff-leaf6 c/p as a new layer, arrange to
right above the frame layer, mirror and resize by
25%, now open xcd-ff-flower3 c/p as a new layer
arrange to right above your frame and resize by
22% and flip, open xcd-ff-bow2 c/p as a new
laye and resize by 38% and rotate to the right by
6 now add a dropshadow of choice
and a tube of choice, hide the white background
layer and merge visible.
I always resize my finished tag BEFORE adding my copyright info,
it makes this seem clearer, add your name and copy right
information and Save the way you prefer to save tags,
I hope you enjoyed this tut
smiles
christy
Ü

Saturday, September 17, 2011

Cozy Autumn Day's
Tube of choice, I used Rion Vernon and a Photo from Stock Xchng
Scrap used Falling Leaves by X-Clusively christy scraps
(full size kit used in tut)
Font of choice I used Studio Lettering Swing
Graphic Program of choice, I use PSP 9
This tutorial assumes you have working knowledge of paint shop pro,
All of my tutorials are my own creation and any similarity
with any other tutorial is purely coincidential.
Please do not copy my tutorials to anyplace, please link back to my blog!
Open a new image 750x750 and flood fill white,
I Like to have room to work, this is your choice,
My tuts are written using this size image
open xcd-fl-paper16 resize by 19% and c/p as a new layer
apply a mask of choice, I used FallMask2byJenny
now open xcd-fl-paper4 resize by 19% and c/p below
this mask layer apply a mask of choice, I used DBVmask111
I then resized the leaf mask layer by 85% and turned
the opacity down to about 70%
Now open xcd-fl-windo c/p as a new layer and resize
by 55% grab your magic wand and click inside the
openings, expand by 9% and then invert, now open
xcd-fl-paper1 resize by 19% and c/p as a new layer
hit delete and select none, in one example I used
a photo from stock exchange instead, now lets open
xcd-tl-ribbon2 c/p as a new layer, resize by 40%
arrange to your liking, now open xcd-fl-leaves10
c/p as a new layer and resize by 36% and then
mirror this, place right above your mask layers,
duplicate and mirror. now open xcd-fl-leaves2
c/p as a new layer and resize by 36% duplicate
and flip, now open xcd-fl-flower3 c/p as a new
layer, resize by 36% Duplicate and rotate to the
left by 90%, now open xcd-flower-5 c/p as a new
layer, place this above the window layer and resize
by 35% now open xcd-flower-6 c/p as a new layer
place below the flower you just added and resize by
35% now open xcd-flower-1 c/p as a new layer
resize by 35% again place below the darker flower
now open xcd-fl-hat c/p as a new layer and resize
by 31% place at the top left of the frame, when you
are happy with your tag add a dropshadow and tube
of choice, hide the white background layer and merge
visible.
I always resize my finished tag BEFORE adding my copyright info,
it makes this seem clearer, add your name and copy right
information and Save the way you prefer to save tags,
I hope you enjoyed this tut
smiles
christy
Ü

Tuesday, August 30, 2011

Pieces of Me
Tube of choice or image, I used Stacey Sharp and Sugargrl14
Supplies by x-clusively christy scraps (download HERE)
Font of choice I used Cherish
Graphic Program of choice, I use PSP 9
This tutorial assumes you have working knowledge of paint shop pro,
All of my tutorials are my own creation and any similarity
with any other tutorial is purely coincidential.
Please do not copy my tutorials to anyplace, please link back to my blog!
Open a new image 850x850 and flood fill white,
I Like to have room to work, this is your choice,
My tuts are written using this size image
Unzip the Supplies, now add a new layer
grab a color from your tube of choice, fill
with this color and apply a mask of choice,
I used 210Insatiable Dreams
Now open the frame I supplied, c/p as a new layer,
depending on if you are using an image or a tube you will
select the inside of the frame openings and expand by
9 and add a new layer and fill with a complimentry color
to the tube, or c/p the image of choice, invert your selection
and hit delete if you are using an image, select none,
now open the ribbon from the supplies, c/p as a new
layer right above the mask layer, resize by 90% now
open the leaves I supplied c/p as a new layer, resize by
80% now mirror and then rotate to the right by 45%
I duplicated mine and then flipped it, I place both on
the left of the frame, now lets open the flower I supplied
c/p as a new layer and resize by 90% I again duplicated
and flipped this, placing with the leaves, Now lets open
the swirl I supplied c/p as a new layer bring this to the top
and resize by 90% place towards the bottom left of the
frame, now open the dots from the supplies, c/p as a new
layer, resize by 70% place near your swirl, I duplicated mine
and then rotated to the left by 55% placing this towards
the right of the frame, now open the word art I supplied
(or use your own) and c/p as a new layer, when you are
happy with your tag add a dropshadow of choice, hide
the white background layer and merge visible, On the
Stacey sharp example I used penta dot and cross on
the filled background,
I always resize my finished tag BEFORE adding my copyright info,
it makes this seem clearer, add your name and copy right
information and Save the way you prefer to save tags,
I hope you enjoyed this tut
smiles
christy
Ü

Sunday, July 17, 2011

In The Pink
Tube of choice, I used Rion Vernon and Cris Ortega
Scrap used In The Pink by x-clusively christy scraps
(full size kit used in this tut)
Font of choice I used Studio Lettering Swing
Graphic Program of choice, I use PSP 9
This tutorial assumes you have working knowledge of paint shop pro,
All of my tutorials are my own creation and any similarity
with any other tutorial is purely coincidential.
Please do not copy my tutorials to anyplace, please link back to my blog!
Open a new image 950x800 and flood fill white,
I like to have alot of room to work, you can always
resize your tag when done!
Open xcd-itp-paper19 resize by 19% c/p as a new layer
apply a mask of choice, I used BtflyFlbyMask4, now
move it towards the left of your work area, duplicate and
mirror, have them BARELY overlapping in the middle.
Now lets open xcd-itp-frame7 c/p as a new layer, resize by
60% now grab your magic wand and click inside the frame
opening, (this frame already has a dropshadow on it so you
will need to make sure you select all of that as well)
expand by 9 and invert, open xcd-itp-paper2 resize
by 19% c/p below the frame and hit delete, select none
Now open xcd-itp-frame6 c/p as a new layer, arrange to right
above the mask layer and then resize by 70% now rotate
to the left by 18%. Now lets open xcd-itp-fan c/p as a new
layer and resize by 30% rotate to the right by 18% place near
the bottom right of the frame, Now lets open xcd-itp-beadspill
c/p as a new layer, arrange below the fan layer, resize by 30%
now duplicate and rotate to the left by 80% arrange this one
towards the right of the frame, now open xcd-itp-flower4 c/p
as a new layer and resize by 24% place near your fan,
now paste this again, arrange to below your frame and paper
layer, resize by 42% place near the top left, duplicate
and flip and mirror, place this one towards the left edge
of the frame, now open xcd-itp-flower5 c/p as a new layer
flip this and then resize by 25% arrange to right above your
fan layer, now open xcd-itp-leaf4 c/p as a new layer, arrange
to right below your beadspill layer, resize by 32% now duplicate
and rotate to the right by 90% and then mirror, arrange along
the right edge of your frame layer, now open xcd-itp-grass
c/p as a new layer, arrange to right above your frame layer,
resize by 36% arrange along the right edge of the frame, duplicate
and rotate to the left by 90% arrange along the bottom edge
of the frame, now lets open xcd-itp-rose2 c/p as a new layer
arrange this to right below flower4 layer (the white daisy) mirror
and then resize by 24%, now lets open xcd-itp-heart2 c/p as a new
layer, arrange this layer to right above the fan layer, resize by
36% and then rotate to the right by 18%, now open xcd-itp-heart3
c/p as a new layer, arrange above the heart layer you just added
resize by 32% and rotate to the left by 18%, now lets open
xcd-itp-butterfly2 c/p as a new layer, bring to the top and resize by
36% place towards the bottom left of your tag, now paste again
this time resize by 18% and place near the top left, I added it
once more this time resizing by 15% and mirroring it. now add a
dropshadow of choice to your tag, (the frame has one already so
I did not dropshadow it) and add a tube or tubes of choice, hide
the white background layer and merge visible.
I always resize my finished tag BEFORE adding my copyright info,
it makes this seem clearer, add your name and copy right
information and Save the way you prefer to save tags,
I hope you enjoyed this tut
smiles
christy
Ü

Subscribe to:
Posts
(Atom)
People I follow




