My Blinkie

Blog Trains

Showing posts with label Zindy S D Nielsen. Show all posts
Showing posts with label Zindy S D Nielsen. Show all posts
Sunday, November 3, 2013

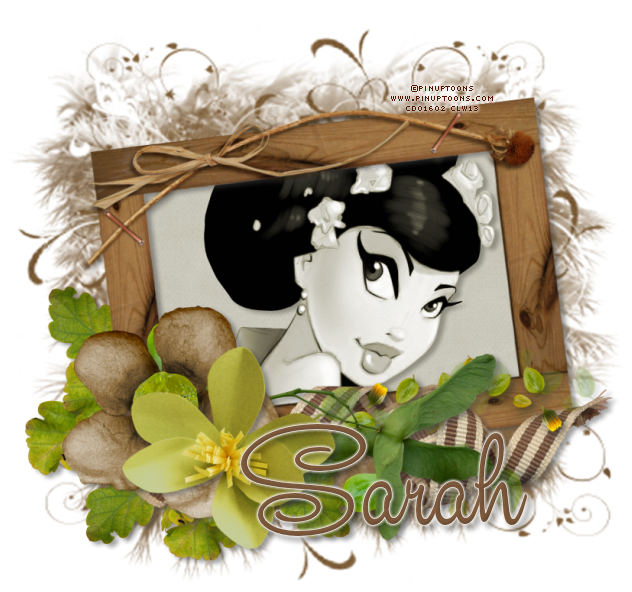
Almost Autumn
Tube of choice, I used Pinuptoons and Zindy S.D. Nielsen
Scrap kit of choice, I used Almost Autumn by Designs by Sarah
Font of choice, I used Studio Lettering Swing
Graphic Program of choice, I use PSP 9
This tutorial assumes you have working knowledge of paint shop pro,
All of my tutorials are my own creation and any similarity
with any other tutorial is purely coincidential.
Please do not copy my tutorials to anyplace, please link back to my blog!
Open a new image 750x750 and flood fill white,
I Like to have room to work, this is your choice,
My tuts are written using this size image
open sb_pmt_almost-autumn_pp5 and c/p as a new layer
apply a mask of choice, I used lrmask144 (this is a photomask)
now open sb_pmt_almost-autumn_frame 1 c/p as a new layer
resize by 90% and rotate to the left by 8% now stretch your mask
out just a bit to show around the frame, grab your magic wand
click inside the frame opening and expand by 9 and invert open
sb_pmt_almost-autumn_pp2 c/p below the frame and hit delete
select none, now open sb_pmt_almost-autumn_leaves bundle c/p as a
new layer right above the mask, duplicate and flip, duplicate
again and mirror, now open sb_pmt_almost-autumn_leaves
c/p as a new layer, bring to the top and mirror now open
sb_pmt_almost-autumn_paper flower 3 c/p as a new layer
right above the frame layer, mirror now lets open
sb_pmt_almost-autumn_paper flower 4 c/p as a new layer
resize by 82% now open sb_pmt_almost-autumn_ribbon 2
c/p as a new layer right above the frame layer now open
sb_pmt_almost-autumn_swirl1 c/p as a new layer right
above the frame and rotate to the right by 18% now add
a dropshadow and a tube of choice, hide the white background
layer and merge visible.
I always resize my finished tag BEFORE adding my copyright info,
it makes this seem clearer, add your name and copy right
information and Save the way you prefer to save tags,
I hope you enjoyed this tut
smiles
christy
Ü
Tube of choice, I used Pinuptoons and Zindy S.D. Nielsen
Scrap kit of choice, I used Almost Autumn by Designs by Sarah
Font of choice, I used Studio Lettering Swing
Graphic Program of choice, I use PSP 9
This tutorial assumes you have working knowledge of paint shop pro,
All of my tutorials are my own creation and any similarity
with any other tutorial is purely coincidential.
Please do not copy my tutorials to anyplace, please link back to my blog!
Open a new image 750x750 and flood fill white,
I Like to have room to work, this is your choice,
My tuts are written using this size image
open sb_pmt_almost-autumn_pp5 and c/p as a new layer
apply a mask of choice, I used lrmask144 (this is a photomask)
now open sb_pmt_almost-autumn_frame 1 c/p as a new layer
resize by 90% and rotate to the left by 8% now stretch your mask
out just a bit to show around the frame, grab your magic wand
click inside the frame opening and expand by 9 and invert open
sb_pmt_almost-autumn_pp2 c/p below the frame and hit delete
select none, now open sb_pmt_almost-autumn_leaves bundle c/p as a
new layer right above the mask, duplicate and flip, duplicate
again and mirror, now open sb_pmt_almost-autumn_leaves
c/p as a new layer, bring to the top and mirror now open
sb_pmt_almost-autumn_paper flower 3 c/p as a new layer
right above the frame layer, mirror now lets open
sb_pmt_almost-autumn_paper flower 4 c/p as a new layer
resize by 82% now open sb_pmt_almost-autumn_ribbon 2
c/p as a new layer right above the frame layer now open
sb_pmt_almost-autumn_swirl1 c/p as a new layer right
above the frame and rotate to the right by 18% now add
a dropshadow and a tube of choice, hide the white background
layer and merge visible.
I always resize my finished tag BEFORE adding my copyright info,
it makes this seem clearer, add your name and copy right
information and Save the way you prefer to save tags,
I hope you enjoyed this tut
smiles
christy
Ü
Wednesday, October 2, 2013

Haunted
Tube of choice, I used Zindy S.D. Nielsen and Caron Vinson
Scrap kit of choice, I used Haunting
(an October 2013 FB freebie by Word Art World)
Font of choice, I used Carpenter Script
Graphic Program of choice, I use PSP 9
This tutorial assumes you have working knowledge of paint shop pro,
All of my tutorials are my own creation and any similarity
with any other tutorial is purely coincidential.
Please do not copy my tutorials to anyplace, please link back to my blog!
Open a new image 750x750 and flood fill white,
I Like to have room to work, this is your choice,
My tuts are written using this size image
open waw_haunting_paper10 resize by 750x750
and c/p as a new layer, apply a mask of choice
I used Vix_BigMask001 merge group
Now open waw_haunting_blackstringframe and c/p
as a new layer, resize by 30% now grab your
magic wand and click inside the frame opening
expand by 7 and invert open waw_haunting_paper3
resize by 750x750 and c/p as a new layer below
the frame hit delete and select none, now open
waw_haunting_tree silhouette c/p as a new layer
place above the mask layer and resize by 18%
now open waw_haunting_leaves c/p as a new
layer and resize by 21% and then mirror now
rotate to the left by 30% paste again and resize
the same now rotate to the right by 46% now
open waw_haunting_blackricrac c/p as a new layer
rotate to the right by 90% and then resize by
21% open waw_haunting_black flower2 c/p as
a new layer and resize by 21% I duplicated 2 times
and placed one below the frame and fill layer,
now open waw_haunting_flower orange c/p as
a new layer resize by 23% I duplicated it and
placed one below the frame and fill layer as well
now open waw_haunting_black gingham bow
c/p as a new layer and resize by 42% now
mirror and then rotate to the left by 90%
open waw_haunting_white button c/p as a
new layer and resize by 26% and rotate to
the left by 12. Open waw_haunting_boo c/p
as a new layer and resize by 18% arrange to
right above the ric rac layer, now add a drop
shadow and a tube of choice, hide the white
background layer and merge visible.
I always resize my finished tag BEFORE adding my copyright info,
it makes this seem clearer, add your name and copy right
information and Save the way you prefer to save tags,
I hope you enjoyed this tut
smiles
christy
Ü

Monday, September 30, 2013

The Witches Cat
Tube of choice, I used Zindy S.D. Nielsen and Caron Vinson
Scrap kit of choice, I used Black Cat Night by Pimp'd Desingz
Font of choice, I used A&S Tuscano Script
Graphic Program of choice, I use PSP 9
This tutorial assumes you have working knowledge of paint shop pro,
All of my tutorials are my own creation and any similarity
with any other tutorial is purely coincidential.
Please do not copy my tutorials to anyplace, please link back to my blog!
Open a new image 750x750 and flood fill white,
I Like to have room to work, this is your choice,
My tuts are written using this size image
open pd13-pp-01 and c/p as a new layer, apply a mask of choice
I used 543InsatiableDreams Mask
now open pd13-frame-04 c/p as a new layer, resize by 90% and
rotate to the left by 6% grab your magic wand and click inside
the frame, expand by 9 and invert, open pd13-pp-02 c/p below
the frame and hit delete, select none, now open pd13-frame-03
resize by 65% and rotate to the right by 6, select the opening and
expand by 9 and invert, add the same paper as above, now open
pd13-wa-02 c/p as a new layer and rotate left by 6 and place at the
top of the first frame(like a plaque) now open pd13-ribbon-03 c/p
as a new layer, arrange below the locket frame and paper, rotate
left by 6 now open pd13-leaf-01 c/p as a new layer, place behind
the locket frame and paper layer and resize by 52% I duplicated
mine a couple times, rotating them I did the same with pd13-leaf-02
I also pasted a few below the bottom frame, you want a nice
fill of leaves. now open pd13-lable-04 c/p as a new layer, arrange
this to below the locket frame and rotate to the left by 26% and
then resize by 65% now open pd13-tickets c/p as a new layer and
resize by 50% and place below the lable. now open pd13-flower-01
c/p as a new layer, place below the ticket layer and resize by 65%
open pd13-flower-04 c/p as a new layer and resize by 76% arrange
with your other flower, now open pd13-cat c/p as a new layer bring
to the top and resize by 80% rotate to the right by 2 now open
pd13-spiderweb and c/p as a new layer inside the big frame layer
resize by 50% and then rotate to the left by 6 Now add your
tube or tubes of choice, and a dropshadow of choice, hide the
white background layer and merge visible.
I always resize my finished tag BEFORE adding my copyright info,
it makes this seem clearer, add your name and copy right
information and Save the way you prefer to save tags,
I hope you enjoyed this tut
smiles
christy
Ü

Saturday, September 29, 2012

Happy Halloween!
Tube of choice, I used Asli Yeniay Kizilay and Zindy S.D.Nielsen
Scrap kit of choice, I used Designs by Sarah's part of the Trick or Treat collab
(you can get this 4 piece scrap collab free with an $8.00 purchase at Pimp my Tags with Scraps)
Font of choice, I used A&S Tuscano Script
Graphic Program of choice, I use PSP 9
This tutorial assumes you have working knowledge of paint shop pro,
All of my tutorials are my own creation and any similarity
with any other tutorial is purely coincidential.
Please do not copy my tutorials to anyplace, please link back to my blog!
Open a new image 750x750 and flood fill white,
I Like to have room to work, this is your choice,
My tuts are written using this size image
Open sb_pmt_trick-or-treat-pp10 c/p as a new layer
apply a mask of choice, I used WSL_HalloweenMask2
Now open sb_pmt_trick-or-treat-frame3 c/p and as a
new layer, rotate to the left by 6 and resize by 90%
you may need to use raster deform tool to stretch your
mask out a bit , now grab your magic wand and click inside
the frame opening, expand by 9 and invert, now open
sb_pmt_trick-or-treat-pp2 c/p as a new layer below the
frame, resize and arrange to your liking, hit delete and
select none, I changed the blend mood to luminance on mine
now open sb_pmt_trick-or-treat-scenery c/p as a new
layer, and mirror, resize by 90% place under the frame
layer and erase any that is showing outside the frame
I added a slight gradient glow using the blue from the
mask layer paper. Now open sb_pmt_trick-or-treat-wordart
c/p as a new layer and resize by 60% add a gradient glow
of choice, now open sb_pmt_trick-or-treat-google eyes
c/p as a new layer and rotate to the right by 24%
and resize by 62% duplicate and mirror.
now open sb_pmt_trick-or-treat-webs c/p as a new
layer, arrange to right above the mask layer and resize
UP by 118%, I added a gradient glow to match the mask
paper and then a white gradient glow as well to it
now add a dropshadow and tube of choice
hide the white background layer and merge visible.
I always resize my finished tag BEFORE adding my copyright info,
it makes this seem clearer, add your name and copy right
information and Save the way you prefer to save tags,
I hope you enjoyed this tut
smiles
christy
Ü

Monday, April 16, 2012

Janeann
Tube of choice, I used Rion Vernon and Zindy S.D. Nielsen
Scrap used Tender Moments by Lila's (Facebook fan freebie)
Font of choice I used Bistro Script
Graphic Program of choice, I use PSP 9
This tutorial assumes you have working knowledge of paint shop pro,
All of my tutorials are my own creation and any similarity
with any other tutorial is purely coincidential.
Please do not copy my tutorials to anyplace, please link back to my blog!
Open a new image 750x750 and flood fill white,
I Like to have room to work, this is your choice,
My tuts are written using this size image
open paper2 from the kit, resize by 19% (750x750)
c/p as a new layer and apply a mask of choice, I used
Kris mask 50
Now lets open the frame from the kit (elmt1) c/p as a new
layer and resize by 30% now rotate to the right by 8
grab your magic wand and cllick inside the opening and expand
by 9, invert and open paper 3 resize by 19% and c/p
as a new layer below the frame, hit delete and select none
now lets open element14 c/p as a new layer and resize by
24% and rotate to the right by 90%, now open element11
c/p as a new layer, resize by 24% and then rotate to the right
by 12. now lets open element 15 c/p as a new layer and
resize by 14%, now mirror, I duplicated and flipped mine
now open element 10 c/p as a new layer, resize by 22%
arrange over the leaves, now open element 7 c/p as a new
layer and resize by 28%. Now open element 12 and c/p as
a new layer, resize by 30% I flipped mine and placed it below
the purple flower layer,now open element 13 and c/p as a new
layer, arrange to right above the frame layer and resize by
22% now mirror and rotate to the right by 23% duplicate
and rotate this one to the right by 90%. Now open element 17
c/p as a new layer, resize by 30% and rotate to the right by
76% arrange right above the curled wood layer, I duplicated
mine and mirrored it, then resized it by 80%, and then
rotated it to the left by 15% and I also used the gamma
correction tool to lighten both a bit. now open element 19
c/p as a new layer, resize by 18% and rotate to the left by
15%, now paste again this time resize by 15% and mirror
rotate to the right by 15% place both near your flowers,
now open element 30 c/p right above your frame layer
resize by 25%, I pasted it again this time resize by 28%
and rotated it to the right by 45% now add a dropshadow
and a tube of choice, hide the white background layer and
merge visible.
I always resize my finished tag BEFORE adding my copyright info,
it makes this seem clearer, add your name and copy right
information and Save the way you prefer to save tags,
I hope you enjoyed this tut
smiles
christy
Ü

Thursday, March 29, 2012

My Angel
Tube of choice, I used Rion Vernon and Zindy Nielsen
Scrap used Ascension by Designs by Sarah
Font of choice I used A&S Snapper Script
Graphic Program of choice, I use PSP 9
This tutorial assumes you have working knowledge of paint shop pro,
All of my tutorials are my own creation and any similarity
with any other tutorial is purely coincidential.
Please do not copy my tutorials to anyplace, please link back to my blog!
Open a new image 750x750 and flood fill white,
I Like to have room to work, this is your choice,
My tuts are written using this size image
Open sb_pmt_ascension_pp4 c/p as a new layer and apply
a mask of choice, I used Artmama mask 6
I duplicated mine 2 times and merged the three layers,
Now lets open sb_pmt_ascension_frame1 c/p as a new layer
grab your magic wand, click inside the frame opening and
expand by 9 now invert, open sb_pmt_ascension_pp8 c/p
as a new layer below the frame, hit delete, select none
now open sb_pmt_ascension_cloud 1 c/p as a new layer
arrange to right above the mask layer,resize by 55%
I duplicated mine and placed one layer below the frame
but above the paper fill layer,now lets open
sb_pmt_ascension_feather2 c/p as a new layer, bring
to the top and resize by 45% arrange to your liking
now open sb_pmt_ascension_ribbon2 c/p as a new
layer, arrange to right above the frame layer, resize
by 84% arrange along the bottom edge of the frame
now open sb_pmt_ascension_wings1 c/p as a new
layer, arrange to right below the frame paper fill
layer, I used the gamma correction to brighten them
just a bit, Now lets open sb_pmt_ascension_tule
c/p as a new layer, arrange this layer to right above
the frame layer, resize by 80% and place a bit to
the left, I also used raster deform tool to squish it
down just a bit, now lets open
sb_pmt_ascension_woodenbranch c/p as a new
layer, flip and place below the feather layer, now
open sb_pmt_ascension_flower3 c/p as a new layer
resize by 48% now open sb_pmt_ascension_flower2
c/p as a new layer and resize by 62% place below
the other flower layer, now open sb_pmt_ascension_flower4
c/p as a new layer, arrange below the other 2 flowers
and resize by 62% I duplicated and flipped then resized
this one by 85% I placed it below the grey paper flower
layer, now open sb_pmt_ascension_gem1 c/p as a
new layer, bring to the top and resize by 36% and
then rotate to the right by 36% I duplicated and
then mirrored this, I moved it down below the blue
flower and have it peeking out a bit, Now add a
dropshadow of choice and a tube of choice, hide
the white background layer and merge visible.
(I did not dropshadow the tule layer or clouds)
I always resize my finished tag BEFORE adding my copyright info,
it makes this seem clearer, add your name and copy right
information and Save the way you prefer to save tags,
I hope you enjoyed this tut
smiles
christy
Ü

Saturday, March 10, 2012

May an Angel Watch over You
This tut is dedicated to my Wonderful friends,
Those that have always been
there for me, and I hope they all
know I am always here for them!
Tube of choice, I used Rion Vernon and Zindy Nielsen
Scrap used My Friends by X-Clusively Christy Scraps
Font of choice I used Majestic
Graphic Program of choice, I use PSP 9
This tutorial assumes you have working knowledge of paint shop pro,
All of my tutorials are my own creation and any similarity
with any other tutorial is purely coincidential.
Please do not copy my tutorials to anyplace, please link back to my blog!
Open a new image 850x850 and flood fill white,
I Like to have room to work, this is your choice,
My tuts are written using this size image
open xcd-mf-paper5 resize by 19% and c/p as a new layer
apply a mask of choice, I used WSLmask254
Now lets open xcd-mf-frame7 c/p as a new layer
resize by 43% grab your magic wand and click inside
the frame opening, expand by 9 and invert, now open
a paper of choice, I used xcd-mf-paper22 resized by
19%, c/p as a new layer below the frame, hit delete
and select none, now open xcd-mf-framewrap and resize
by 59% arrange to your liking on the frame, now open
xcd-mf-greenery10 c/p as a new layer, resize by 36%
place this layer right above your mask layer and near
the top right of the frame, now open xcd-mf-greenery9
c/p as a new layer resize by 50% and then flip, place
this below the ribbon layer, now open xcd-mf-greenery7
c/p as a new layer, resize by 42% flip and mirror and
then rotate to the right by 11 placing this with the other
grass blade, now open xcd-mf-greenery3 c/p as a new
layer, resize by 38% and then mirror, now rotate to
the left by 84%, I placed this below the frame and
paper, I then pasted again resizing the same and then
placed this along the bottom edge of the frame, now
lets open xcd-mf-flower10 c/p as a new layer, I placed
this layer right above the frame layer, resize by 33%
now open xcd-mf-flower6 c/p as a new layer resize by
24% now mirror, Now open xcd-mf-flower8 c/p as a
new layer and resize by 35%, Now lets open xcd-mf-flair1
c/p as a new layer bring to the top and resize by 22%
place with your flowers, I then added xcd-mf-flair7 resized
the same tucked behind the flowers,now open xcd-mf-bird1
c/p as a new layer and mirror, resize by 36% I placed
mine along the edge of the frame, now add a dropshadow
and a tube of choice, hide the white background and merge
visible.
I always resize my finished tag BEFORE adding my copyright info,
it makes this seem clearer, add your name and copy right
information and Save the way you prefer to save tags,
I hope you enjoyed this tut
smiles
christy
Ü

Tuesday, November 1, 2011

Autumn Morning Bliss
Tube of choice, I used Rion Vernon and Zindy S.D. Nielsen
Scrap used Autumn Morning By PolkaDot Scraps
Font of choice I used Julietrose Std
Graphic Program of choice, I use PSP 9
This tutorial assumes you have working knowledge of paint shop pro,
All of my tutorials are my own creation and any similarity
with any other tutorial is purely coincidential.
Please do not copy my tutorials to anyplace, please link back to my blog!
Open a new image 750x750 and flood fill white,
I Like to have room to work, this is your choice,
My tuts are written using this size image
open PDS_AM-paper7 c/p as a new layer and apply
a mask of choice, I used WH-mask4
Now lets open PDS_AM-frame1 c/p as a new layer
rotate to the left by 6, grab your magic wand and
click inside the frame opening, expand by 9 and invert
open PDS_AM-paper5 c/p as a new layer below
the frame and hit delete, select none, now lets open
PDS_AM-stiches c/p as a new layer rotate to the
left by 6 resize by 65% and arrange to your liking
at the bottom of the frame, I then pasted again
resized the same and put one at the top, now paste
once more, this time rotate to the left by 96%
resize by 82% and line up with your other stitches
now open PDS_AM-chicken c/p as a new layer,resize
by 50%, now mirror, Now open PDS_AM-flower 1
c/p as a new layer place above the mask layer
and towards the bottom left of the frame, Now lets
open PDS_AM-flower5 c/p as a new layer, below the
chicken layer, mirror and then rotate to the left by
45% duplicate, mirror and resize by 72%, Now open
PDS_AM-watch, c/p as a new layer, resize by 24%
and then mirror, place with your chicken, now open
PDS_AM-string4 c/p as a new layer and resize by
78% "hang" from the top right of the frame, now
open PDS_AM-button2 c/p as a new layer, resize
30% and place at the top of the string, now open
PDS_AM-leaves c/p as a new layer, arrange to
right above your mask layer, resize by 50%
now rotate to the left by 36% duplicate and flip
place both peeking out from behind your flower,
now open PDS_AM-frame4 c/p as a new layer
place right above your mask layer, mirror and
then rotate to the left by 22%, now lets open
PDS_AM-ribbon1 c/p as a new layer, place this
below your button layer and mirror, resize by
55%, now add a dropshadow and tube of choice
hide the white background layer and merge
visible,
I always resize my finished tag BEFORE adding my
copyright info, it makes this seem clearer,
add your name and copy right information and
Save the way you prefer to save tags,
I hope you enjoyed this tut
smiles
christy
Ü

Tuesday, August 16, 2011

My Little Puppy
Tube of choice, I used Zindy Nielsen and Rion Vernon
Scrap used The Girls of PMTwS collab, PolkaDot Scraps part
Font of choice I used Dartangnon ITC
Graphic Program of choice, I use PSP 9
This tutorial assumes you have working knowledge of paint shop pro,
All of my tutorials are my own creation and any similarity
with any other tutorial is purely coincidential.
Please do not copy my tutorials to anyplace, please link back to my blog!
Open a new image 650x650 and flood fill white,
I am trying to make my tags smaller so I am going to start with
a bit smaller work area, this is your choice if you want
to make a larger tag.
Open PDS_GPC-paper7 c/p as a new layer and apply a mask of
choice, I used DBV Mask 113
Now open PDS_GPC-frame5 c/p as a new layer, rotate to the
right by 6% grab your magic wand and click inside the frame
opening, expand by 9 and then invert, open PDS_GPC-paper6
c/p as a new layer below the frame and hit delete, select none
now open PDS_GPC-frame2 c/p as a new layer right above
the mask layer and then resize by 80% move towards the
left and up a bit, duplicate and place this one towards the bottom
right, I used gamma correction to lighten them just a bit,
open PDS_GPC-leaves3 c/p as a new layer, arrange to right
above the circle frame and resize by 80% move towards the
bottom right of the square frame, now rotate to the right by 16%
now paste these leaves again, bring to the top, resize by 80%
and then rotate to the left by 12% place towards the right of
the square frame, now duplicate and mirror, rotate this to the
left by 22% arrange so they cover the corner of the frame,
now lets open PDS_GPC-ribbon1 c/p as a new layer, resize by 75%
and then rotate to the left by 6% place with your leaves,
Now open PDS_GPC-flower5 c/p as a new layer and resize by 75%
place with your leaves and ribbon, I mirrored this one, I duplicated
it and then resized this one by 85% and then mirrored this,
Now open PDS_GPC-charm1 c/p as a new layer, resize by 40%
place with your flowers, Now open PDS_GPC-puppy1 c/p as a
new layer, resize by 70% arrange below the charm layer, now open
PDS_GPC-hearts3 c/p as a new layer, flip and then mirror, now
resize by 70% and place this layer below your flower layer
Now open PDS_GPC-ribbon3 c/p as a new layer, arrange to right
above the frame layer, resize by 70% I duplicated it and then
rotated this to the right by 96% then flipped and mirrored it, placing
up the right side of the frame, now open PDS_GPC-bow1 c/p
as a new layer, resize by 128% and then mirror, place at the
top left of the frame, now open PDS_GPC-butterfly1 c/p as a new
layer, resize by 48% now rotate to the left by 26% paste again
this time mirror and rotate to the right by 18% and resize by 48%
add more if you like, Now add a dropshadow of choice to your
elements and a tube or tubes of choice, hide the white background
layer and merge visible.
I always resize my finished tag BEFORE adding my copyright info,
it makes this seem clearer, add your name and copy right
information and Save the way you prefer to save tags,
I hope you enjoyed this tut
smiles
christy
Ü

Tuesday, May 31, 2011

Night Magic
Tube of choice, I used Zindy Nielsen and Rion Vernon
Scrap used Into the Night Collab by PolkaDot Scraps
Font of choice I used Cherish
Graphic Program of choice, I use PSP 9
This tutorial assumes you have working knowledge of paint shop pro,
All of my tutorials are my own creation and any similarity
with any other tutorial is purely coincidential.
Please do not copy my tutorials to anyplace, please link back to my blog!
Open a new image 650x650 and flood fill white,
I am trying to make my tags smaller so I am going to start with
a bit smaller work area, this is your choice if you want
to make a larger tag.
Open PDS_ITN-paper7 c/p as a new layer resize this
by 90% and apply a mask of choice, I used Artmama
mask 06
Now lets open PDS_ITN-frame5 c/p as a new layer
move it down just a bit and grab your magic wand and click
inside the frame opening, expand by 5 and then invert
open PDS_ITN-paper3 c/p as a new layer below the frame
hit delete and select none, Now open PDS_ITN-leaves1
c/p as a new layer, place this right above the mask layer
and then resize by70% I placed mine on the right of the
tag, duplicate and flip and then duplicate and rotate to the
right by 90% arrange along the bottom edge of the frame
Now open PDS_ITN-wire1 c/p as a new layer place this right
above the mask layer, now open PDS_ITN-string1 c/p as a
new layer bring this to the top resize by 75% place towards
right of the frame, Now open PDS_ITN-ribbon1 c/p as a new layer
mirror and place with your string, resize by 50%, Now open
PDS_ITN-flower1 c/p as a new layer arrange with
the greenery that is showing along the bottom of your
frame, resize by 75% now open PDS_ITN-flower5
c/p as a new layer resize by 85%,place with your other
flower, Now open PDS_ITN-flower3 c/p as a new layer
resize by 75% two times, I duplicated mine and placed
one above all the other flower layers and one below the
other flower layers, Now open PDS_ITN-butterfly c/p
as a new layer and mirror, resize by 60% I duplicated
mine and placed one towards the top of the frame and
one towards the bottom, Now open PDS_ITN-key c/p
as a new layer, resize by 50% and rotate to the right by
90% I placed my ribbon on top of the key like it is tied
to it, Now open PDS_ITN-moon c/p as a new layer
arrange to right above the mask and then resize by
65% and place towards the top right, Now add
a dropshadow of choice to your elements and a tube
of choice, hide the white background layer and merge
visible.
I always resize my finished tag BEFORE adding my copyright info,
it makes this seem clearer, add your name and copy right
information and Save the way you prefer to save tags,
I hope you enjoyed this tut
smiles
christy
Ü

Saturday, February 26, 2011
 Bonnie
Tube of choice, I used Rion Vernon and Zindy S.D. Nielsen
Scrap used Bonnie by PolkaDotScraps (part of the Vampire Diaries Set)
you can get each kit individually as well
Bonnie
Tube of choice, I used Rion Vernon and Zindy S.D. Nielsen
Scrap used Bonnie by PolkaDotScraps (part of the Vampire Diaries Set)
you can get each kit individually as wellFont of choice I used Chateau
Graphic Program of choice, I use PSP 9
This tutorial assumes you have working knowledge of paint shop pro,
All of my tutorials are my own creation and any similarity
with any other tutorial is purely coincidential.
Please do not copy my tutorials to anyplace, please link back to my blog!
Open a new image 750x750 and flood fill white,
(you can ALWAYS resize later, I like having plenty of room to work)
open PDS_VDB-paper1 c/p as a new layer and resize by 90%
apply a mask of choice, I used WSL_mask4
Now open PDS_VDB-frame4 c/p as a new layer rotate to the
left by 3 now paste it again now arrange like in my example,
merge the two frame layers together, now grab your magic
wand and click inside the frame openings and expand by 9
and then invert, open PDS_VDB-paper3 c/p as a new layer
below your frames layer, resize by 80% and then hit delete,
select none,Now lets open PDS_VDB-leaves2 c/p as a new
layer, place this layer right above the mask layer, duplicate
and flip then mirror, now open PDS_VDB-flower1 c/p as a new
layer and resize by 70% two times, arrange towards the
bottom left of the frames, now open PDS_VDB-deco1
c/p as a new layer, resize by 55% and then rotate to
the right by 115% arrange this layer below the frame layer
and have it peeking out the bottom edge a bit, now open
PDS_VDB-ribbon1 c/p as a new layer and resize by 75%
then rotate to the right by 24% place at the top right of
the frame, now open PDS_VDB-charm1 c/p as a new layer
mirror and then resize by 45% place so it looks to be hanging
from the ribbon, now open PDS_VDB-crystalflower1 c/p
as a new layer, arrange so it is below the paper flower layer
and resize by 45% place with your paper flower, now open
PDS_VDB-button1 c/p as a new layer and mirror now resize
by 55% and place with your flowers, Now open PDS_VDB-sparkle1
c/p as a new layer, arrange this below the frame but above
the paper fill layer, duplicate and flip and mirror, arrange one
towards the top and one towards the bottom of the frame,
you will have some hanging outside the frame, now add
a dropshadow of choice to your elements and a tube or tubes
of choice, (I did not dropshadow the blue deco or the sparkles)
hide your white background layer and merge visible.
I always resize my finished tag BEFORE adding my copyright info,
it makes this seem clearer, add your name and copy right
information and Save the way you prefer to save tags,
I hope you enjoyed this tut
smiles
christy
Ü

Subscribe to:
Posts
(Atom)
People I follow




